Language:      C#
Subject:       Framework
Contributor:   ArcGIS Pro SDK Team <arcgisprosdk@esri.com>
Organization:  Esri, https://www.esri.com
Date:          11/05/2026
ArcGIS Pro:    3.8
IDE:           Visual Studio 2026, Visual Studio Code
This ProGuide explains how to configure and use Visual Studio Code (also known as "VS Code") with or without GitHub Copilot to develop ArcGIS Pro add-ins.
This guide has three main sections:
- Setting up Visual Studio Code for ArcGIS Pro Add-in Development
The steps in this section are prerequisites for developing ArcGIS Pro extensions with the Pro SDK and only need to be performed once before developing add-ins or other ArcGIS Pro extensions. - Develop an Add-in with VS Code using only the ArcGIS Pro SDK VS Code extension This section walks you through creating an ArcGIS Pro sample add-in with VS Code using only the ArcGIS Pro SDK VS Code extension. Copilot is not required.
- Develop an Add-in with VS Code using GitHub Copilot
This section shows an ArcGIS Pro sample add-in development workflow in VS Code using GitHub Copilot. Copilot is required.
A finished sample for this ProGuide is available here: MyVSCodeAddin
Prerequisites
To use GitHub Copilot within Visual Studio Code, you need to meet the following requirements:
- A GitHub account: You need a GitHub account to use GitHub Copilot. If you don't have one, you can sign up for free at GitHub.
- Sign up for a GitHub Copilot plan or subscription: GitHub Copilot is a paid service, but it offers a free trial period.
- To test this add-in, a sample dataset has been provided that can be downloaded from: https://github.com/Esri/arcgis-pro-sdk-community-samples/releases. Specifically, use the release asset called "CommunitySampleData-3D-11-21-2025.zip," which contains an ArcGIS Pro project called 'Elevation\HawaiiElevation.aprx'. This project contains all feature layers and test data needed to test the add-in created in this ProGuide.
Setting up Visual Studio Code for ArcGIS Pro Add-in Development
Step 1 Open Visual Studio Code and open a new workspace
- Open a "New Window" in Visual Studio Code.
- Use the "Open Folder" menu option to open a new workspace.
Step 2 Set up the editor and Copilot environment.
In Visual Studio, an .editorconfig file defines project‑specific coding style settings that override global text editor options, and Visual Studio (both VS Code and VS 2026) applies them automatically when the file is present in the project or solution folder. A sample of .editorconfig can be found in the root of this repository: https://github.com/Esri/arcgis-pro-sdk-community-samples.
You can customize GitHub Copilot in Visual Studio by placing instruction, skill and agent files in the ".github" folder to guide Copilot’s responses and coding style. The https://github.com/Esri/arcgis-pro-sdk-copilot repository provides a template for GitHub Copilot customizations for developers building ArcGIS Pro SDK for .NET solutions. It combines repository instructions, specialized agents, reusable skills, project templates, scripts, and curated reference material so Copilot can give consistent pattern guidance, refer developers to authoritative SDK resources, and create supported project types.
The content is intended for third-party ArcGIS Pro SDK developers using GitHub Copilot Chat in Visual Studio Code and Visual Studio 2026.
This content is provided as-is. You may adopt the complete workspace or reuse selected instructions, skills, templates, and references in your own repositories.
For a detailed explanation of the customization architecture and its capabilities, see ProConcepts Pro SDK AI Features for GitHub Copilot.
- This step is optional: In order to maintain a consistent code format you can download the .editorconfig file from the root of the https://github.com/Esri/arcgis-pro-sdk-community-samples repository and copy the .editorconfig file into the root of your workspace.
- Clone or download the Copilot repository from here: https://github.com/Esri/arcgis-pro-sdk-copilot. Copy the .github folder from the downloaded repository into the root folder of your workspace or merge the content if you already have an existing .github folder.
Step 3 Install the latest ArcGIS Pro SDK VS Code extension
- Start Visual Studio Code.
- Open the Extensions view by clicking the Extensions button on the Activity Bar or pressing Ctrl+Shift+X.
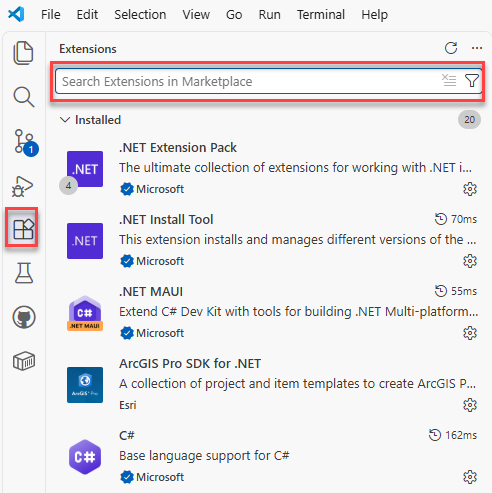
- Type ArcGIS Pro SDK in the Marketplace search box.
- Select ArcGIS Pro SDK for .NET, confirm that the publisher is Esri, and click Install.
- If prompted, restart Visual Studio Code.
- Verify that the ArcGIS Pro SDK for .NET templates and utilities are installed in Visual Studio Code:
- Open the Command Palette by pressing Ctrl+Shift+P.
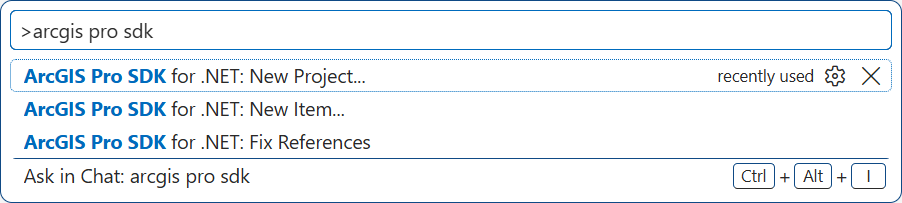
- Type ArcGIS Pro SDK.
- Confirm that the ArcGIS Pro SDK commands are listed, including New Project, New Item, and Fix References.

If your organization provides the extension as a downloaded .vsix file, open the Extensions view, click the Views and More Actions ellipsis button, select Install from VSIX..., and select the ArcGIS Pro SDK for .NET .vsix file.
Develop an Add-in with VS Code using only the ArcGIS Pro SDK VS Code extension
To demonstrate how to use the "ArcGIS Pro SDK for .NET" VS Code extension to develop an ArcGIS Pro add-in, we create a sample add-in with a few UI elements such as a DockPane, some buttons on the ArcGIS Pro ribbon, and a map tool.
Step 1 Create a new add-in with the ArcGIS Pro SDK VS Code extension
- Open the "Explorer" window in VS Code by using the "Explorer" button or pressing Ctrl+Shift+E.
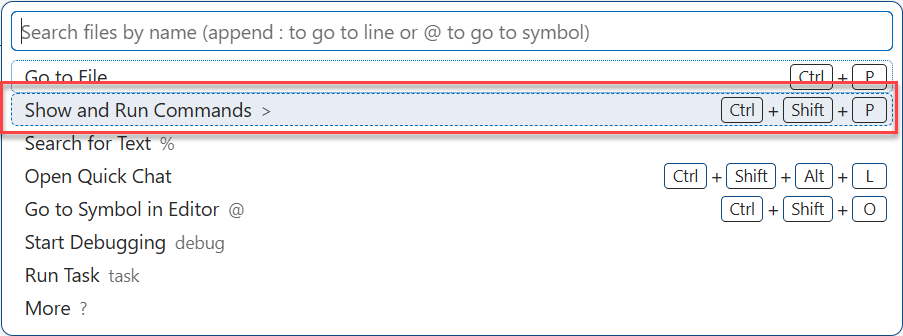
- Open the "Show and Run Commands" window by pressing Ctrl + Shift + P.
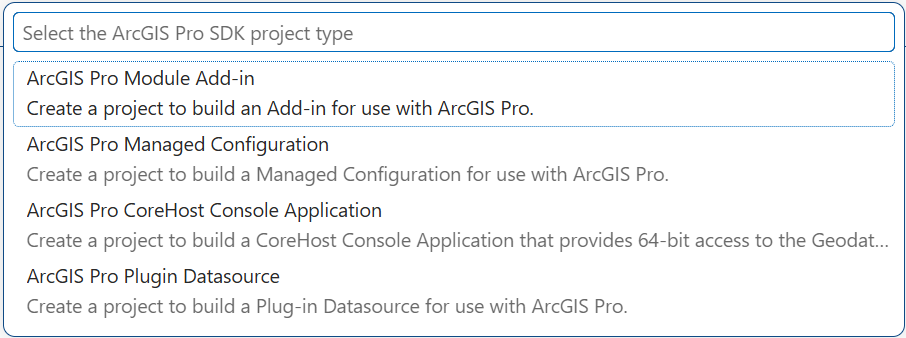
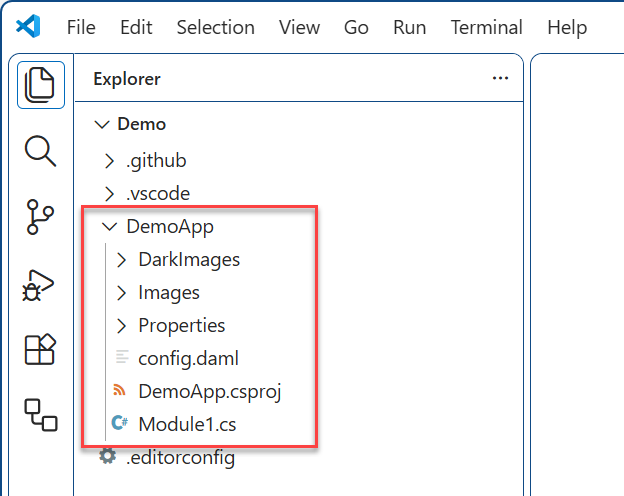
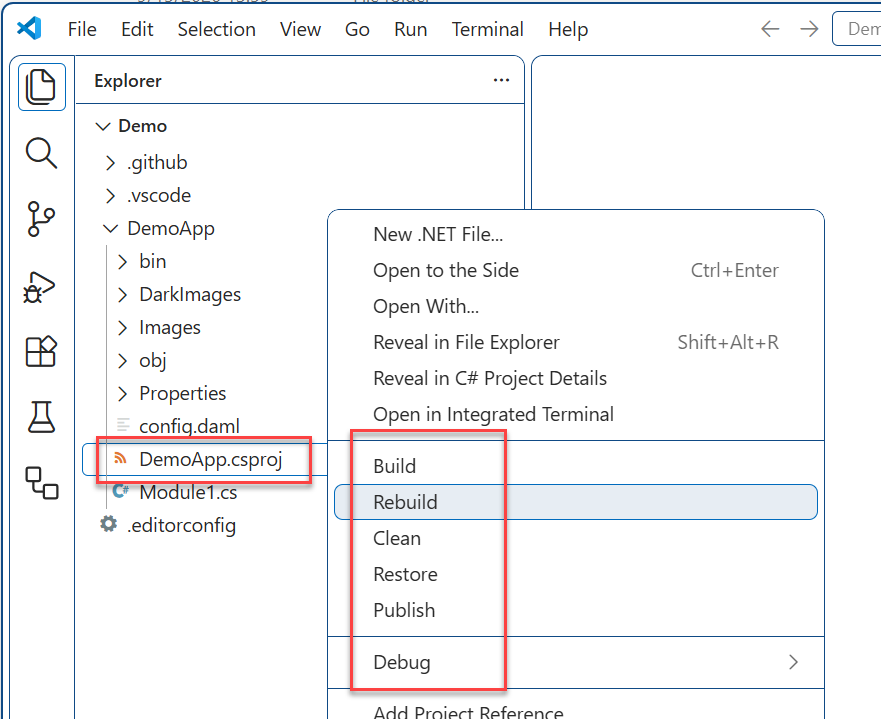
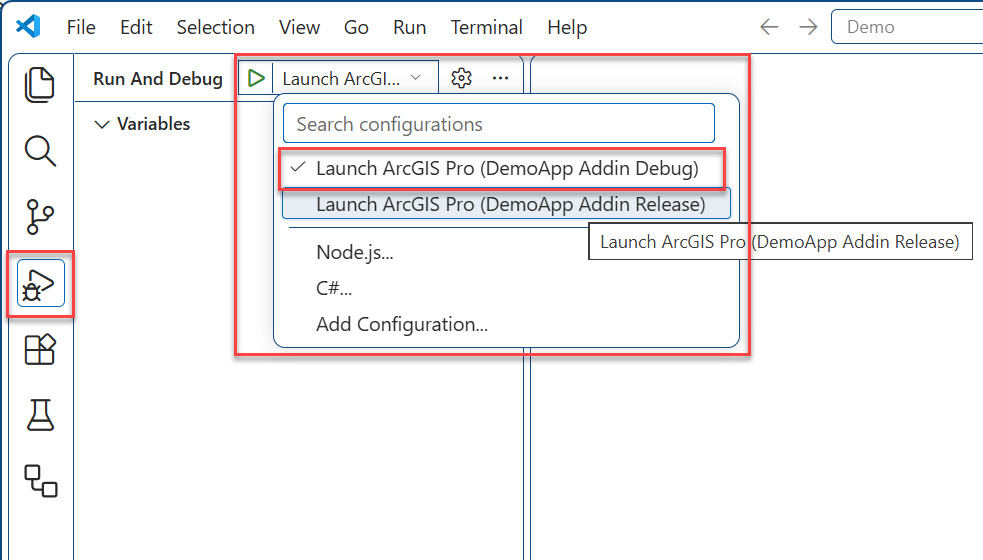
Step 2 Add new UI elements using the ArcGIS Pro SDK VS Code extension
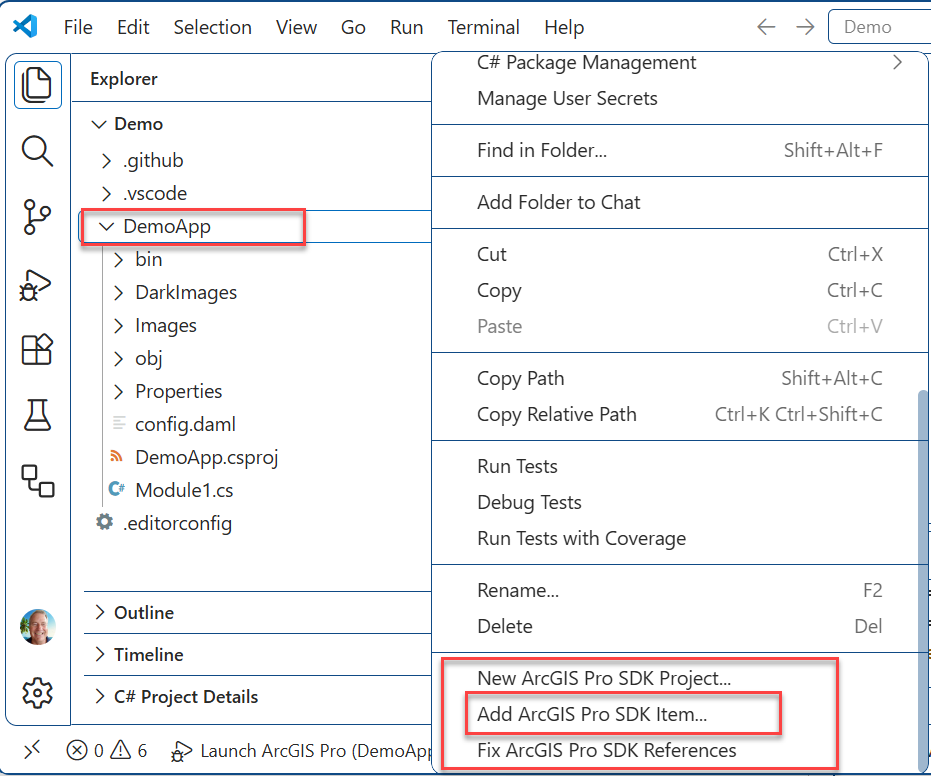
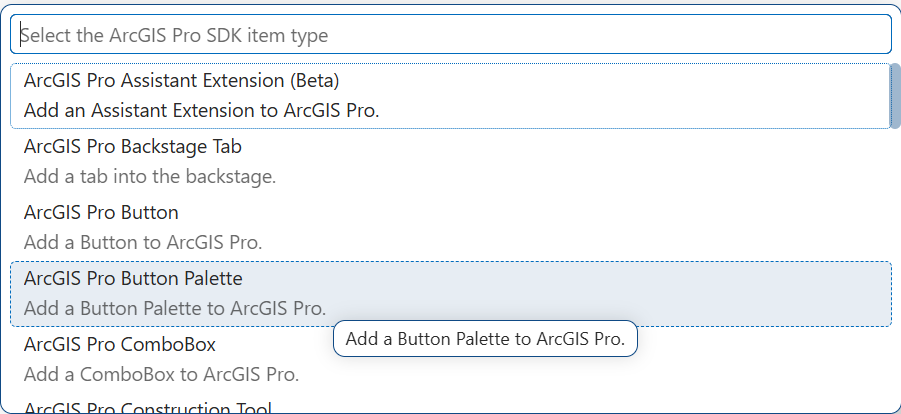
- Add UI elements to your DemoApp add-in by using the right-click context menu or the "Show and Run Commands" window and selecting the "New Item" option.
Develop an Add-in with VS Code using GitHub Copilot
To demonstrate how to use GitHub Copilot in VS Code to develop an ArcGIS Pro add-in, we create a sample add-in that uses a DockPane to guide the ArcGIS Pro user through a GIS workflow. A dockpane allows the user to select a 2D parcel lot feature on a 3D map, displays the selected parcel's ID, shows a drop-down option for selecting a multi-patch polygon resolution (0 = rough through 100 = fine in 10 increments), and at the bottom contains a button to create a 3D representation of the selected parcel lot geometry. When clicked, the button creates a 3D feature of the selected parcel as a multi-patch feature in the "Lot MultiPatch" layer. To debug and run the add-in, the 'Elevation\HawaiiElevation.aprx' project can be downloaded (see the Prerequisites section above for details).
Note: When using GitHub Copilot, any suggestions provided by Copilot depend on a variety of factors and cannot be reliably duplicated. AI models are continuously trained on large datasets and generate responses based on patterns learned from that data. User interactions, context, and timing can all influence the output. Therefore, while this guide provides a structured approach to using GitHub Copilot for ArcGIS Pro add-in development, the specific suggestions and code implementation you receive may vary from those shown here.
Step 1 New workspace in VS Code and asking Copilot what type of ArcGIS Pro extension to use
- In Visual Studio Code, open the existing workspace that was set up here: Setting up Visual Studio Code for ArcGIS Pro Add-in Development, or set up a new workspace.
- Open the Chat window through the View menu or use Ctrl + Alt + I.
- In the Chat window, ask Copilot which extension is best for the type of GIS workflow that we want by using the following prompt:
What type of ArcGIS Pro extension should I use to implement a GIS workflow that can be run from an ArcGIS Pro dockpane? 4. The response from Copilot is: Use an ArcGIS Pro Module Add-in. ... more details follow ...
Step 2 Create a new MyVSCodeAddin project with all the needed UI elements
- In VS Code, create a new ArcGIS Pro add-in project called 'MyVSCodeAddin' with some initial UI modifications to the Pro ribbon. Use the following prompt in the Chat window:
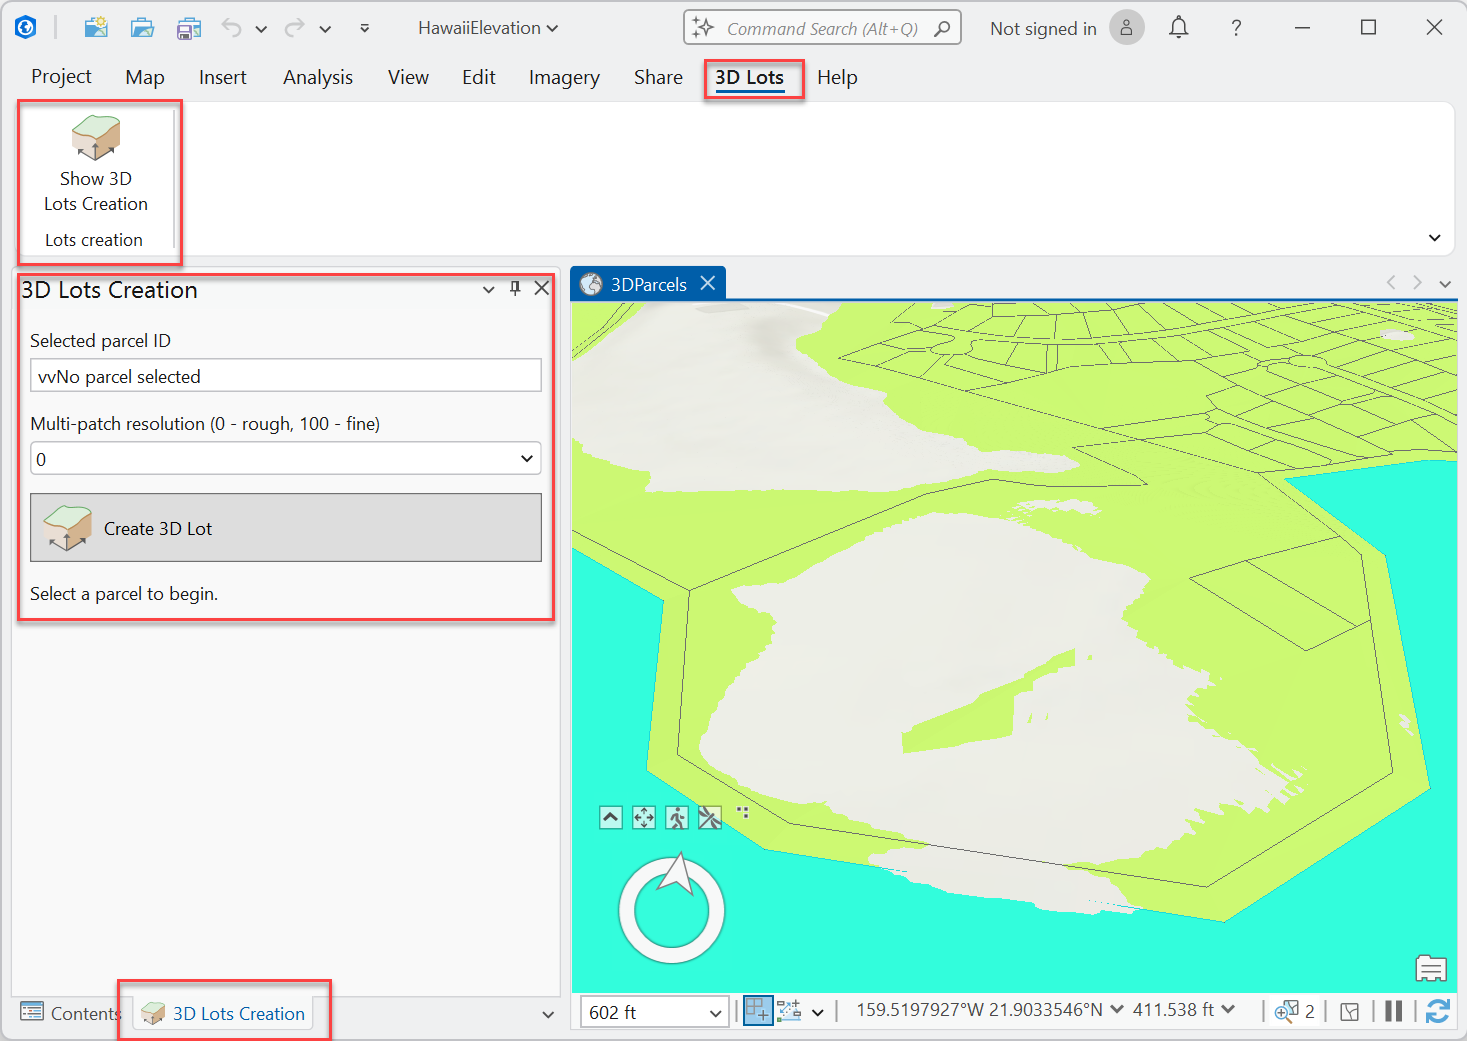
Create a new ArcGIS Pro Module Add-in project called MyVSCodeAddin. Change MyVSCodeAddin to add a new ArcGIS Pro tab on the ArcGIS Pro ribbon called '3D Lots'. This tab contains a group called 'Lots creation'. The 'Lots creation' group contains an ArcGIS Pro button called 'Show 3D Lots Creation', and this button should use the "3DAnalystSurfaceVolume32" image resource from ArcGIS Pro for its image. None of the newly created controls shall appear on the AddInTab. Use the 'Show 3D Lots Creation' button to instantiate a new '3D Lots Creation' dockpane with a text box to display the selected parcel ID, a drop-down to select the multi-patch resolution (0 - rough through 100 - fine in 10 increments), and a button to create the 3D lot called 'Create 3D Lot'. The 'Create 3D Lot' button is a button that shows an image (ArcGIS Pro.exe 3DAnalystSurfaceVolume32 resource), and the 'Create 3D Lot' button text appears to the right of the image. 2. Rebuild MyVSCodeAddin. 3. Run and debug MyVSCodeAddin.
Step 3 Wire up the lot feature selection
- To wire up the lot/parcel feature selection, we need to display the parcel ID in the dockpane and remember the selected parcel's polygon geometry. Use the following prompt:
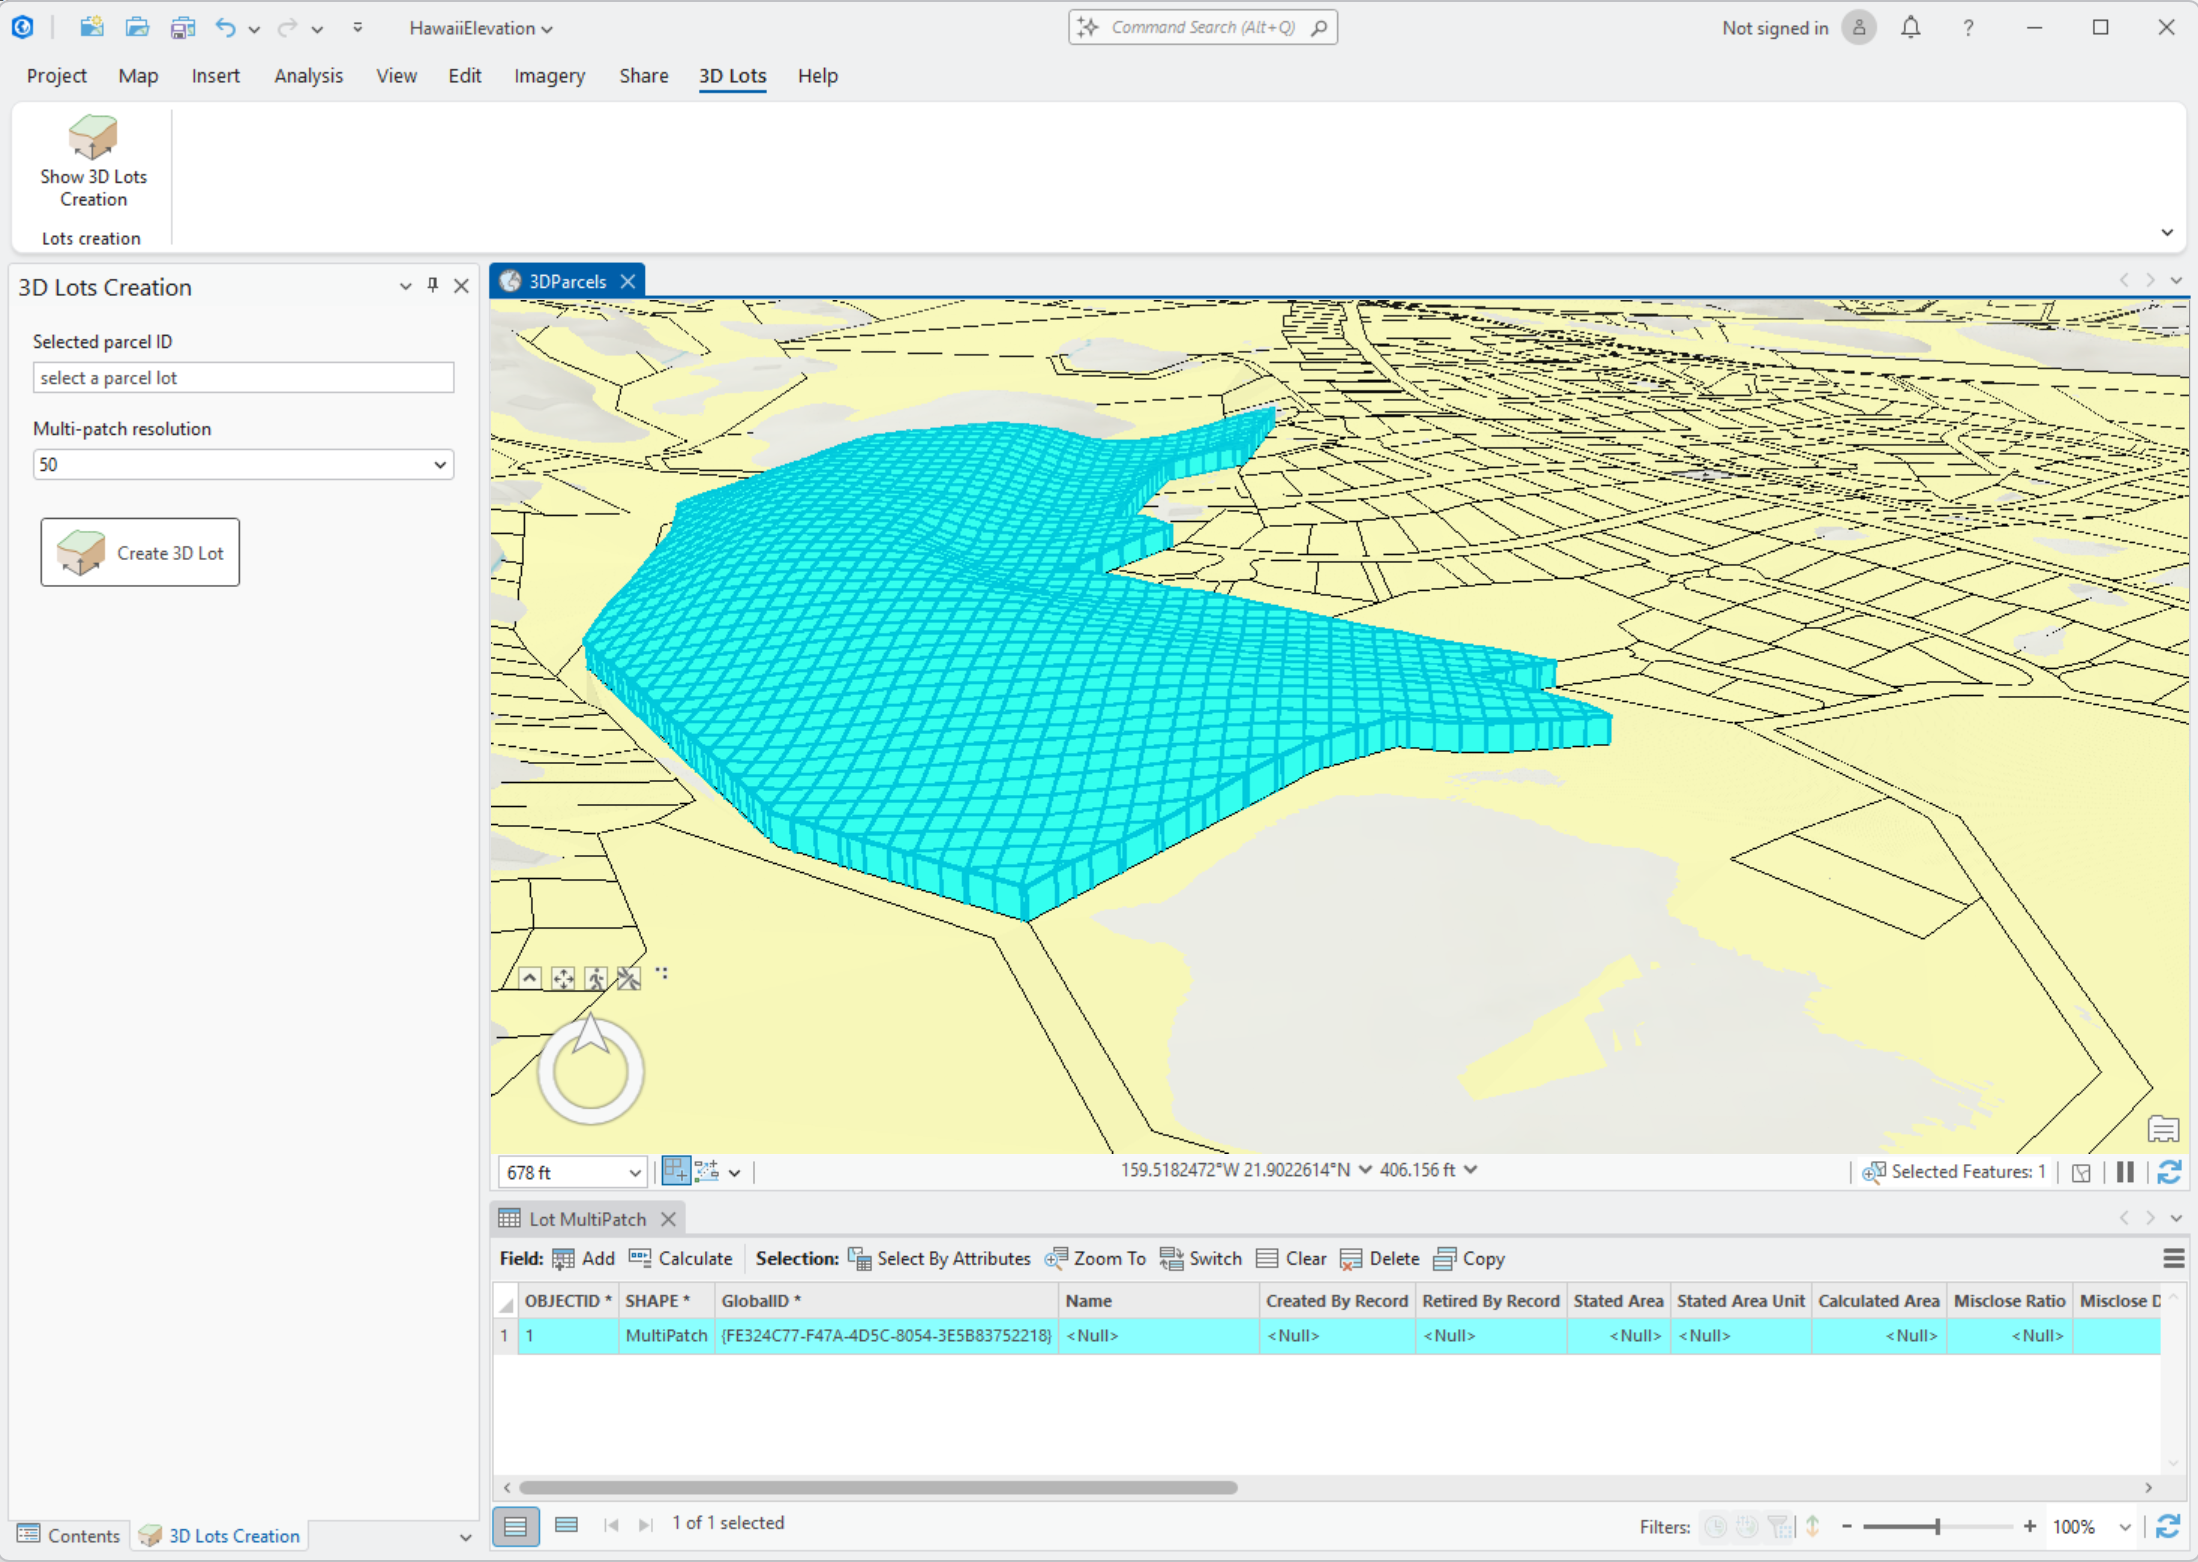
Subscribe to the MapView SelectionChanged event and use the first feature from the selection in the 'Lots' feature layer to query the 'Lots' feature layer for the 'Name' field value. Update the SelectedParcelId property in the dockpane with this "Name" attribute column's value in order to display it in the Dockpane. If no parcel has been selected on the map, display 'select a parcel lot' in the SelectedParcelId text box. Create a property of the type Polygon named "SelectedGeometry" and, when assigning the SelectedParcelId, store the cloned value of the "Shape" attribute column as a Polygon in the SelectedGeometry property. 2. Optional: Debug and run the app and confirm that the SelectedParcelId text box and the Polygon in the SelectedGeometry property are set as required.
Step 4 Implement the logic to create the 3D mesh polygon Implement the logic to create the 3D lot when the user clicks the "Create 3D Lot" button in the DockPane. This involves using the selected parcel geometry, generating a multi-patch based on the selected resolution, and adding it to a new feature layer.
- In the Copilot Chat window, type the following prompt:
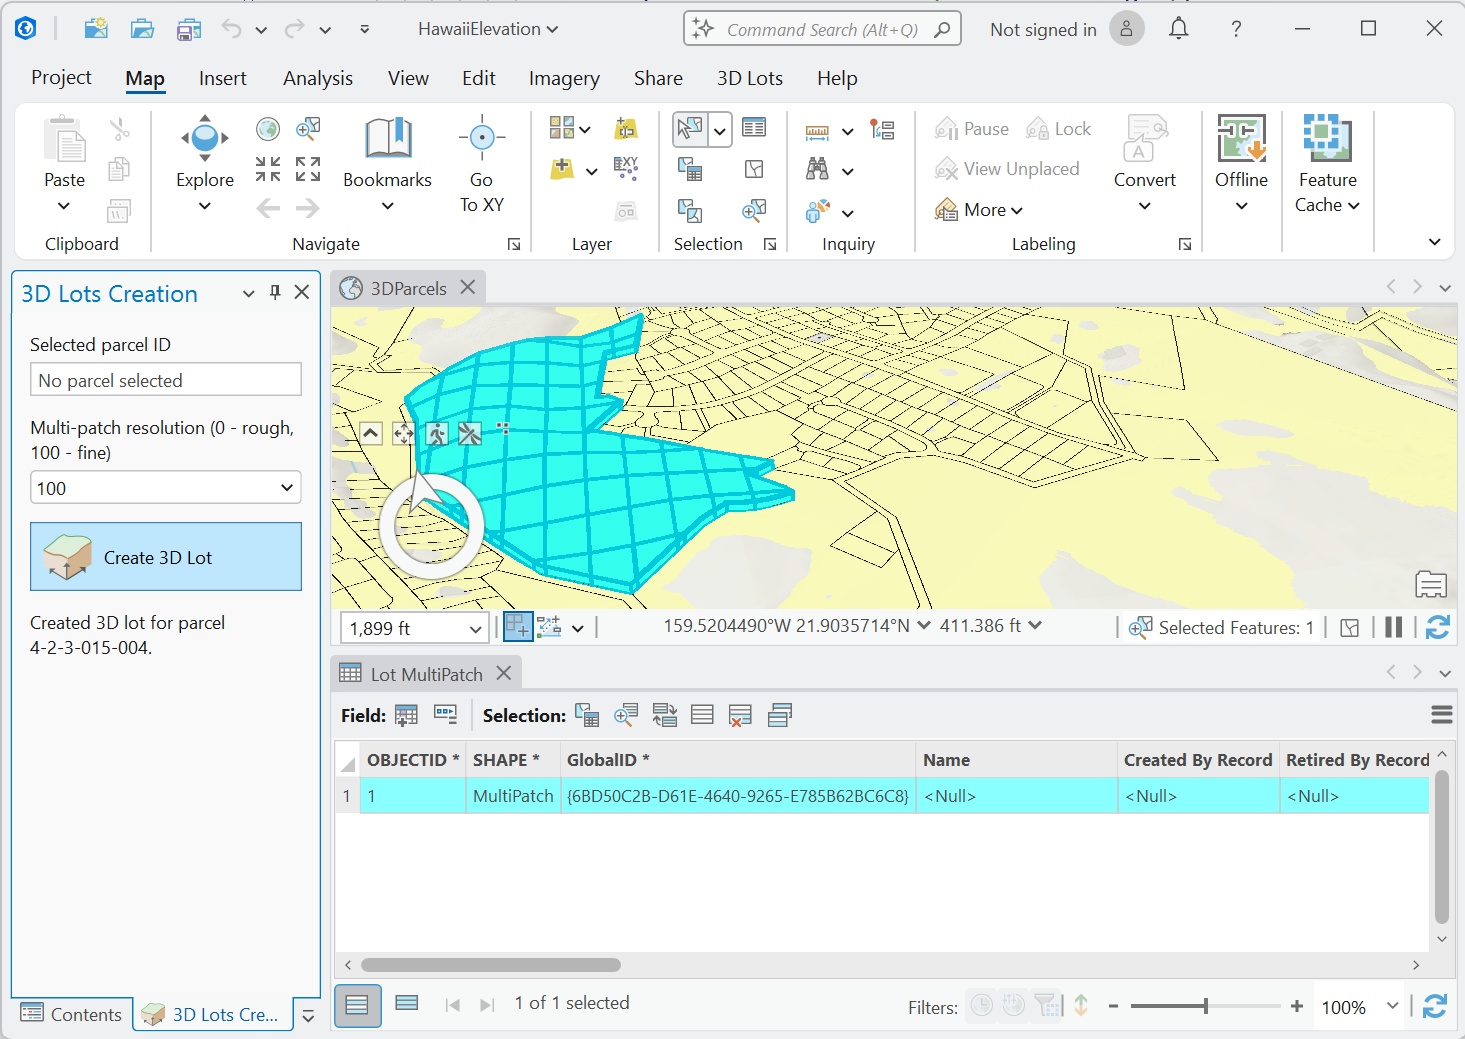
Implement the 'Create 3D Lot' button action so it divides the selected parcel geometry into a grid of envelopes, clips the parcel geometry with each envelope, and extrudes the resulting polygons to create a 3D multi-patch. The multi-patch is then added to the "Lot MultiPatch" feature layer in the active map. If the "Lot MultiPatch" layer is not found, the operation is aborted. The method requires a valid parcel geometry to be selected. If no geometry is selected, a message box notifies the user. The resolution of the grid can be adjusted using the SelectedResolution property, with a default value of 10 if not specified. The resolution of the grid specifies the number of envelopes used to clip the parcel geometry across the X and Y axes. The method also ensures that the "Lot MultiPatch" layer exists in the active map. If the layer is not found, the operation is aborted, and the user is notified via a message box. This method performs asynchronous operations, including geometry processing and interaction with the map's surface to retrieve Z values. It must be executed on the QueuedTask context to ensure thread safety when interacting with ArcGIS Pro's API. 2. Debug and run the app and confirm that the 3D mesh polygon is created using the selected resolution.
- Sometimes when you run the app, you will encounter a runtime error or exception. If this happens to you, let Copilot know what you did when the error occurred and paste a copy of the error message into the prompt window. For example:
At runtime, when I clicked the "Create 3D Lot" button, the application failed with this error: Unexpected HRESULT has been returned from a call to a COM component.
4. Or sometimes the expected functionality doesn't work, if this is the case specify the problem and let Copilot fix the issue, for example:
The generated 3D Lot polygon is not displaying in the 3D mapview.
or
The generated 3D polygon feature appears below the surface.
5. If you get any more exceptions, rinse and repeat.
Note: For information on how to use the Pro SDK VS Code Copilot chat participant with natural language prompts in your Pro SDK development, please refer to Using prosdkhelper with Copilot in VS Code in the ProConcepts Pro SDK AI features.