FME Workbench essentials
![]() Available with Data Interoperability license.
Available with Data Interoperability license.
The Workbench app is a visual workflow editor used for developing data transformation tools. When the Data Interoperability extension is installed and license is enabled, you can use it to create Spatial ETL tools and custom formats.
Starting Workbench app
The Workbench app can be used as a standalone app or as an integral part of the Spatial ETL tool.
To launch Workbench as a standalone app, you can launch it from ArcGIS Pro Analysis > Data Interoperability ribbon or from Windows Start > ArcGIS folder menu.
Within the context of ArcGIS Pro, from a geoprocessing toolbox you can launch the Workbench app as a Spatial ETL tool:
Right-click a toolbox
 on the Project pane and click New > Spatial ETL Tool.
Right-click an existing spatial ETL tool
 and click Edit.
Getting product help in the Workbench app
Your first go-to for product help is on the Start tab of the Workbench app. It provides online links to the product resources.
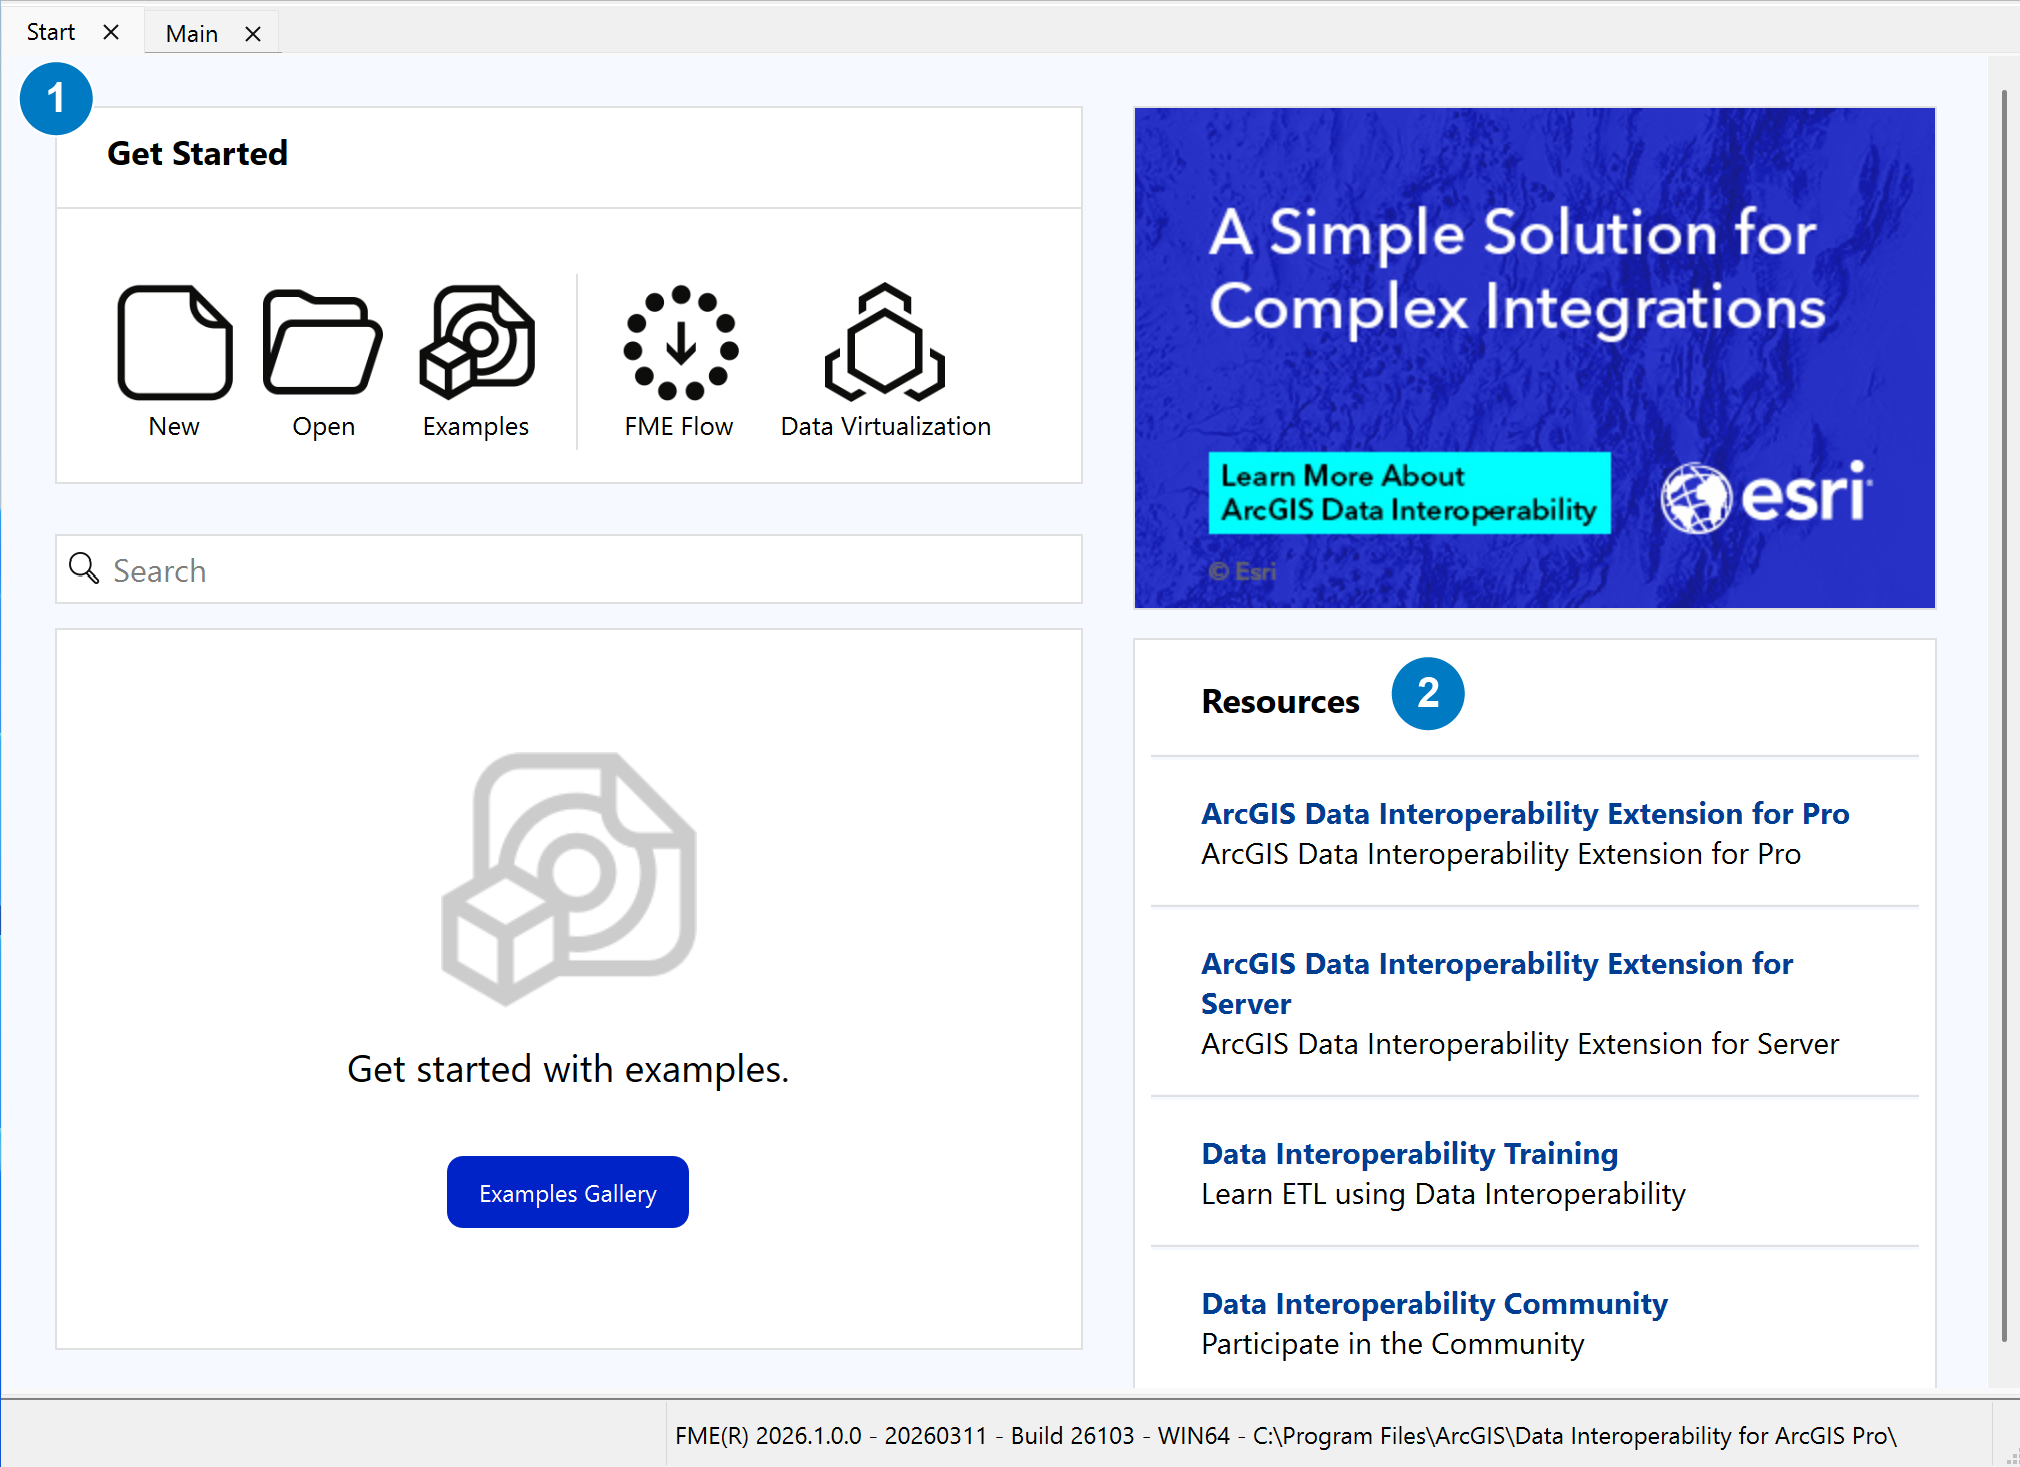
| Element | Description |
|---|---|
| 1 | Click Start tab of the Workbench app |
| 2 | Resources pane with links to product help, training resources, and the ESRI Data Interoperability Community place |
Workbench application help
The Workbench default help is online and no additional configuration is required to use help.
The offline help files are excluded from the setup. If you want to use offline help or do not have an active internet connection, you can change the default help to offline by clicking Utilities > FME Options > Default Paths tab > from the main menu.
Important:
Before you can enable the Use Offline Help Only check box, the path to the offline help documentation must appear in the Documentation Access table in the Utilities > FME Options > Default Paths tab.
Follow the configuration steps in Default Paths tab dialog as shown in the image below.
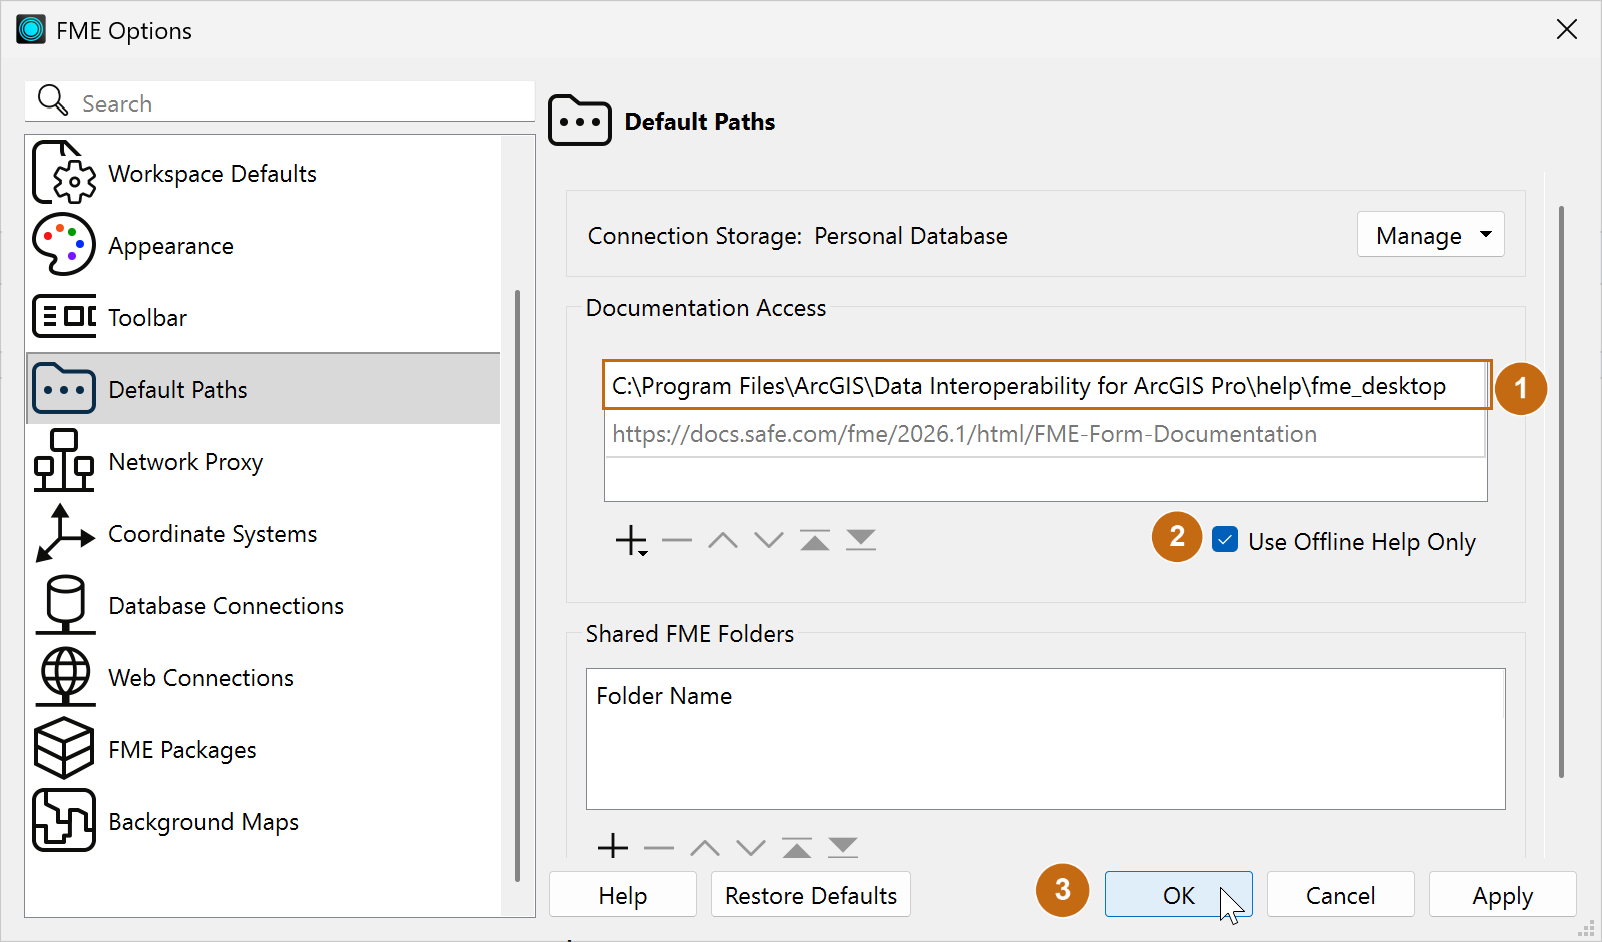
To configure the offline help path (see note below) follow similar configuration steps in the online article from Safe Software.
Check the Use Offline Help Only check box.
Click OK at the bottom of the FME Options dialog to save the offline configuration.
Note:
The parent path to the help folder is the default installation directory of the product.
Once you have your help path configured—online or offline—you can get help in several ways.
Workbench Help page is found on the top menu, click Help > FME Help. You can also access the same help page from Workbench by pressing the F1 key.
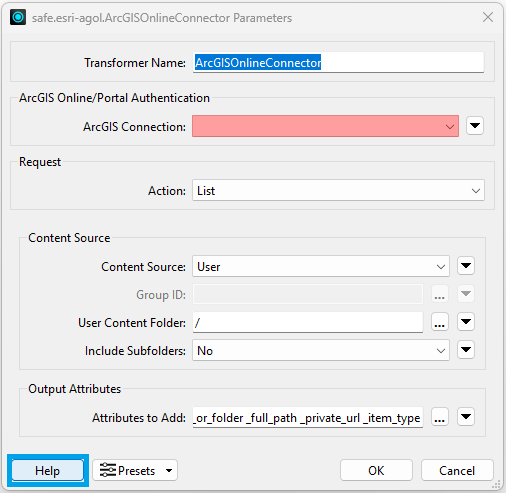
The Workbench help is context-sensitive and provides help for specific objects and settings while you use the application. From any object properties opened in your canvas, you can access the context-sensitive help in the Workbench app by pressing the F1 key or clicking the Help button on the object's dialog box.
For help with a format reader or writer, click the source or destination object on the canvas and press F1.
For help with a transformer, click the transformer object on the canvas and press F1.
For help with a particular setting, click the Help button found at the bottom left corner of the object's dialog box.
The workspace canvas
Starting the Workbench opens the main window and workspace canvas. The canvas displays the data sources, connections, transformers, and destination features that define your spatial ETL tool. By default, you work from left to right beginning with the source data objects, directing dataflow using connectors to link outputs to inputs, and terminating the flow at the destination features.
- Use the Quick Add dialog to add datasets, transformers, and connectors to your canvas. The dialog has text search filter, category filters, and provides quick info to highlighted canvas object.
This dialog appears in multiple ways—using any of the two Quick Add buttons on the canvas or by typing on your keyboard in the context of the canvas.
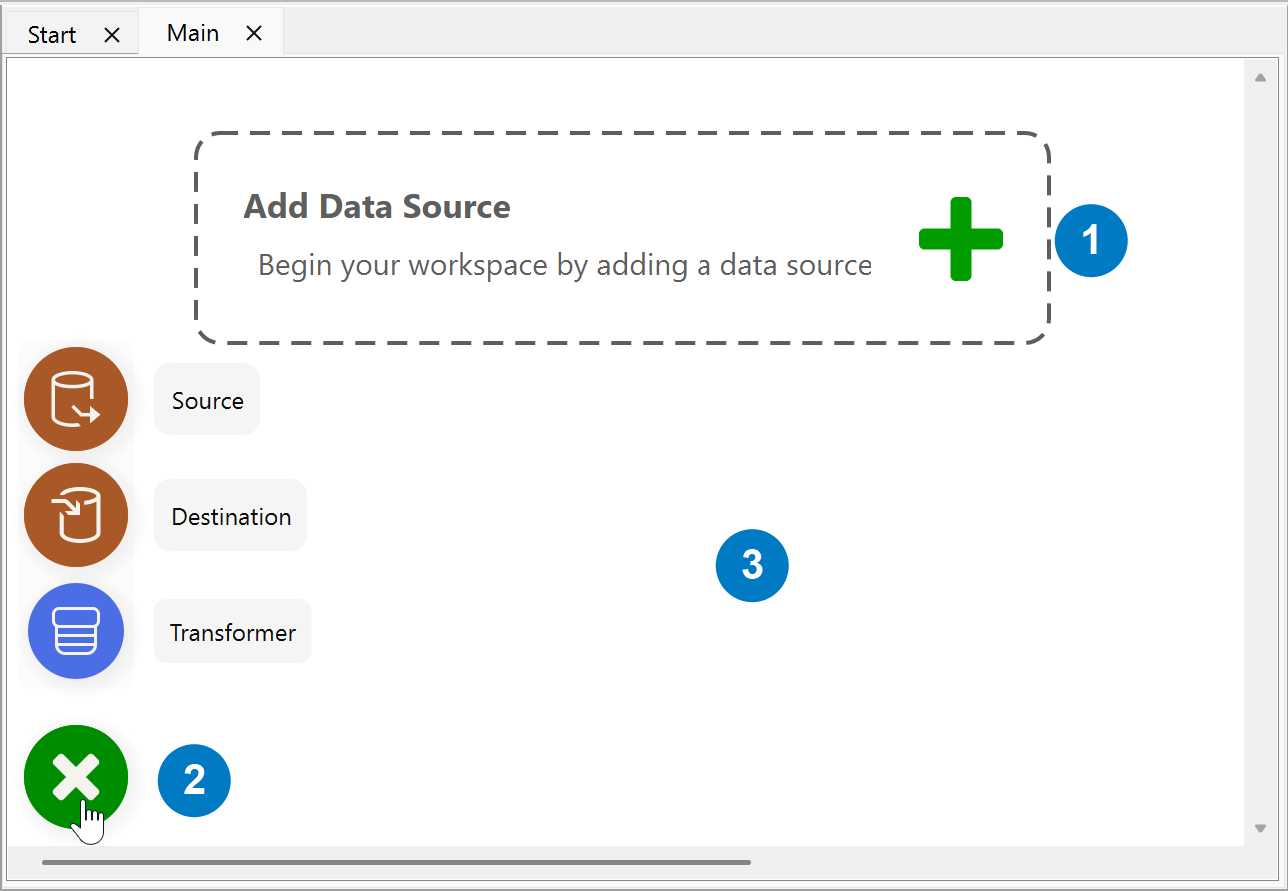
The Add Data Source box opens the Transformer Gallery dialog with the Source category selected.
The Quick Add button on the lower left corner shows the Source, Destination and Transformer categories in the Transformer Gallery dialog.
Click on the white space of the canvas and start typing to search the gallery by typing text. For example, type the letters "ute" will filter the gallery to show all transformers with "ute" in their name, such as AttributeCreator, AttributeRemover, etc.
Below are other ways to interact with the canvas with your keyboard.
To select multiple objects, press and hold the Ctrl key while clicking, or click and drag the pointer.
Use the F2 key to rename attributes.
Use the Delete key to delete any object.
Press on Ctrl + / to display other shortcut keys in the app.
Navigator
Navigator is an explorer window that displays your workspace in a tree view. It provides a visual status of your readers, writers, transformers, parameters and offers immediate access to editing dialog boxes.
To open the Navigator window from the main menu, click View > Window Layout > Navigator.
To edit parameters, right-click the parameter and click Edit Parameter.
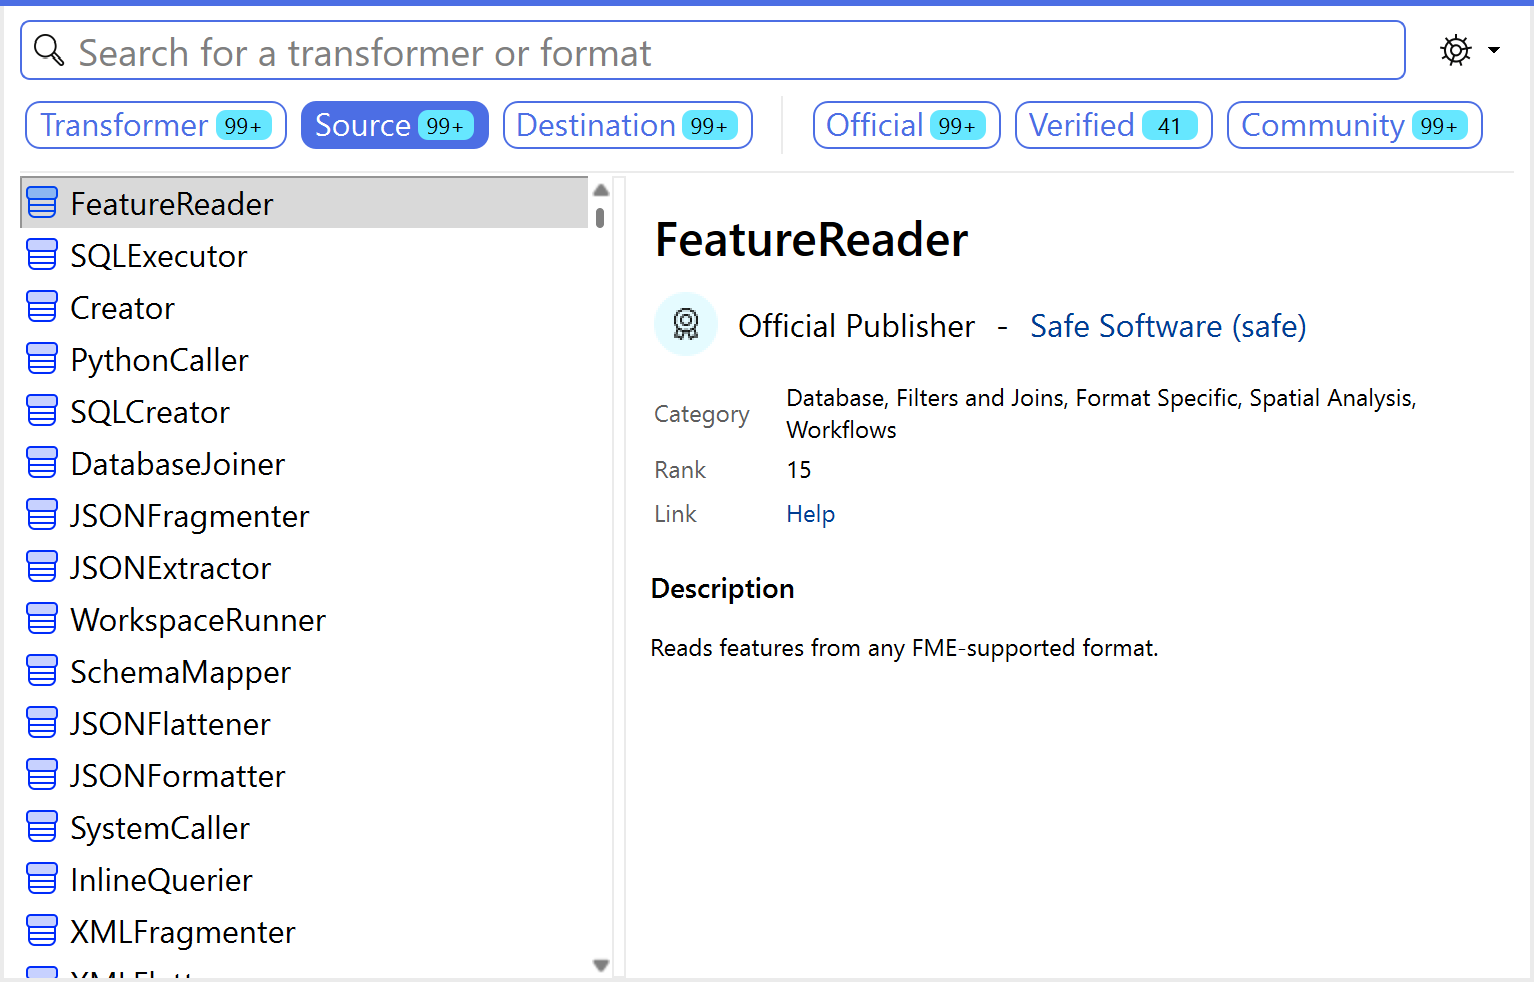
Transformer Gallery
Transformer Gallery is an explorer window that enables you to browse for transformers by category or search for them by entering one or more keywords that describe a name or function. To add a transformer to your workspace, double-click or drag the transformer onto the canvas.
To open the Transformer Gallery window from the main menu, click View > Window Layout > Transformer Gallery.
Log
The Translation Log pane is a text window that displays detailed information about your translation during run time. Use it to trace errors and warnings and document the execution of your spatial ETL tool. When the translation is finished, you can search for specific text strings, copy and paste the contents to other text files, or save all the information to a log (.log) file.
To configure the Workbench app to generate a log file each time you run a translation, click Tools > FME Options, click Translation on the navigation menu, and check the Save log to file check box.