Apply visual effects in scenes
Use visual effects to add creative, abstract representations of GIS content in 3D scenes. You can use visual effects to deemphasize data flaws, promote a different artistic reality, or stylize a view for use as a promotional image.
The table below lists the visual effects you can apply to a scene:
| Visual effect | Description | Example |
|---|---|---|
| Black and White |
Removes color and applies a grayscale visual effect using only shades of gray, similar to a black-and-white photograph. | 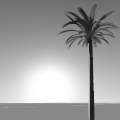 |
| Blueprint |
Applies an architectural or landscape design plan visual effect to the view that draws the outlines of the scene on top of a white grid and blue background. | 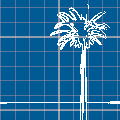 |
| Cross Mosaic |
Applies a crosshatched mosaic visual effect similar to tiled flooring. | 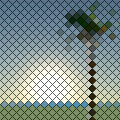 |
| Halftone |
Simulates a grayscale gradient-like visual effect by using single-tone dots of various size and spacing, similar to how newspapers print images. | 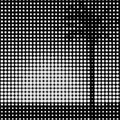 |
| Hex Mosaic |
Applies a hexagonal mosaic visual effect similar to the results of hex-based binning. |  |
| Monochromatic |
Applies a color visual effect using shades of a single color or hue. similar to a color filter. | 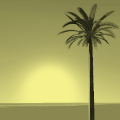 |
| Outline |
Draws the outlines of the scene on a solid background. Default colors are blue lines and white background. | 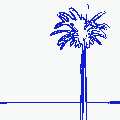 |
| Pencil Sketch |
Applies a pencil shading effect to make the appearance of a pencil drawing or sketch. | 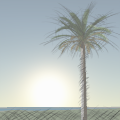 |
| Pixelated |
Simulates a smaller resolution display with a limited color palette representative of some video games. | |
| Toon |
Applies cel shading to give the appearance of a flat cartoon visual effect. |  |
| Watercolor |
Simulates watercolor painting with fuzzy edges and colors that blend into each other. |  |
Once activated, the visual effect is applied to the entire scene. Only one visual effect can be applied at a time, and some visual effects include additional configuration options. Visual effects can be used in combination with camera effects and postprocessing effects, to layer the effects and create new final results of the view.
Apply a visual effect
Use the following steps to apply a visual effect in a scene:
Activate the scene view, if necessary.
On the View tab, in the Scene group, click the Visual Effect drop-down arrow to open the gallery of visual effects.
Once an effect is selected, it is applied immediately. The Black and White visual effect is the default.
Click the Visual Effect button
 to switch an effect on or off.
Optionally, click the drop-down gallery and click Visual Effect Settings
 to customize the active visual effect by updating properties or changing the active visual effect type.
Save or share scenes with a visual effect
Visual effects are saved with the scene for all open views and are reapplied when you open the project. Visual effects are included when using Capture To Clipboard, from a scene or a layout containing a scene frame, exporting the scene to an image file, exporting a layout containing a scene frame, or exporting an animation to a video file. Visual effects are removed when sharing the scene to a map package, a map file, or a web scene. A warning is raised to indicate that the effect will not be visualized on the web.
Note:
To include visual effects in a video file, use animation to build keyframes capturing the state of the view, apply a visual effect, and export the animation. Visual effect settings are not captured in keyframes and will not change during the export of a single animation.