ArcGIS Pro as a client for Reality Server
ArcGIS Pro provides a comprehensive workspace for reality mapping for drone, digital aerial, and satellite images. If ArcGIS Pro is connected to an ArcGIS Enterprise site configured with Reality Server, image adjustment and 2D and 3D product generation can be processed on the server. Products generated are automatically shared as imagery layers (True Ortho/DTM/DSM), scene layers (3D mesh), point cloud layers (3D Point Cloud), or gaussian layers on the portal.
Note:
ArcGIS Pro requires a Standard or Advanced license to be used as a client for Reality Server.
Complete the following steps to use ArcGIS Pro as client for drone, digital aerial, or satellite data processing:
Add an ArcGIS Enterprise site configured with Reality Server and set it as an active portal in ArcGIS Pro.
See the Manage portal connection from ArcGIS Pro tutorial for more details.
Create a Reality mapping workspace to be processed on the server.
On the Imagery tab, click the New Workspace drop-down menu and choose New workspace.
In the Workspace Configuration window, provide a name for the workspace and specify other settings accordingly. Click Next.
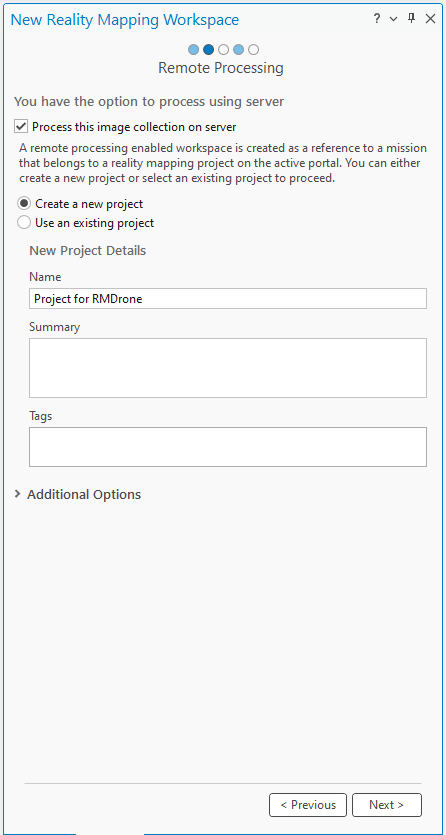
In the Remote Processing window, check Process this image collection on server. Project definition option appears.
For remote processing, ArcGIS Reality Server uses projects and missions to manage reality mapping across one or more data capture sessions. A project is a top-level workspace for managing reality mapping activities. It organizes all imagery acquisition, processing, and outputs associated with a specific geographic location or mapping effort across one or more missions. A mission is a container for a single data capture session, holding all related imagery and the resulting processed data products. A project can include multiple missions from different capture sources, such as satellite, drone, or aerial.
A remote enabled workspace is a reference to a mission that must belong to a project on the active portal. Create a new project or select an existing project and click Next to proceed. The Image Collection window appears.
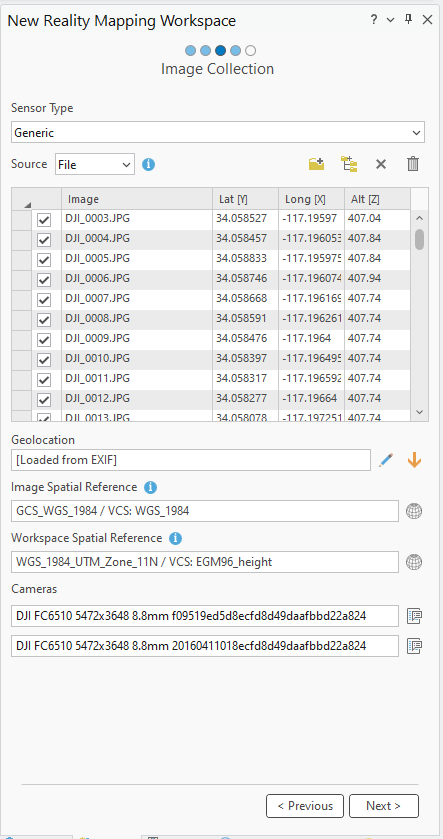
- In the Image Collection window, import the images to process. Click Next.
In the Lidar Collection window, Click Next.
Click Finish in the Data Loader Options.
Perform an adjustment.
Generate Reality mapping products.
See the following detailed tutorials for each sensor workflow:
Create drone imagery products in ArcGIS Pro using Reality Server
Create 2D digital aerial imagery products in ArcGIS Pro using Reality Server
Create 3D digital aerial imagery products in ArcGIS Pro using Reality Server
Create a digital surface model product from satellite imagery in ArcGIS Pro using Reality Server