Creating an Observation Workbench
Prerequisites
Imagery from which to collect the image observations (required).
Digital elevation data that fully overlaps the images to be orthorectified. Required only for orthorectification of imagery.
Existing observation layer feature classes. These are optional.
Create an Observation Workbench
There are two ways to start Create Observation Workbench in ArcGIS AllSource. Choose the method that best serves your workflow.
Create an Observation Workbench from the start page.
Create an Observation Workbench from within an open project.
Create an Observation Workbench from the start page.
Launch Create Observation Workbench from the AllSource starting page by clicking Observation Workbench.
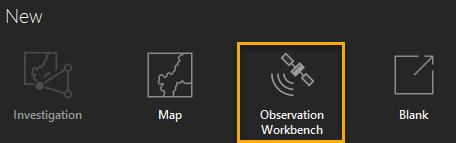
The new project opens with Create Observation Workbench in a new view window. The Imagery tab is active.
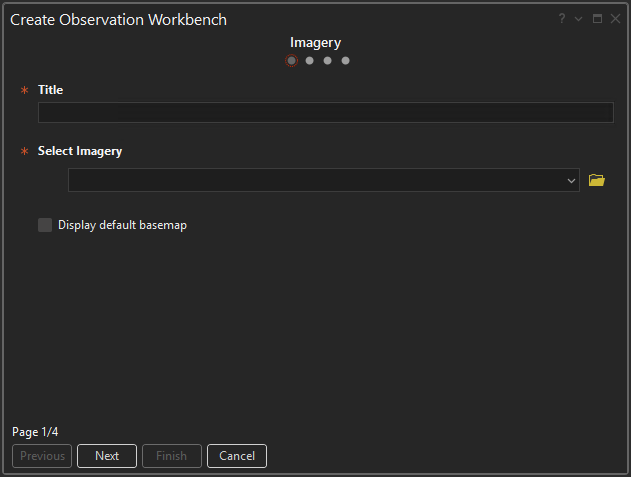
Title your workbench and select image data (required).
Type a title for the new workbench.
Click Browse
 to choose one or more images from your data location.
Click Display default basemap to add a basemap in the new workbench. Basemaps are not included by default.
Click Next to continue.
Important:
Orthorectification can only be performed on an image with supported sensor model information, and only if elevation data is provided in the next step. Images without the prerequisites will be included in the output map, but not orthorectified.
Select raster elevation data (required to orthorectify imagery).
Click Browse
to choose from your data location.Elevation will be displayed in the new workbench and is used to orthorectify sensor model images for which the elevation fully overlaps.
Optionally, expand Advanced to change elevation data parameters for the selected elevation layer.
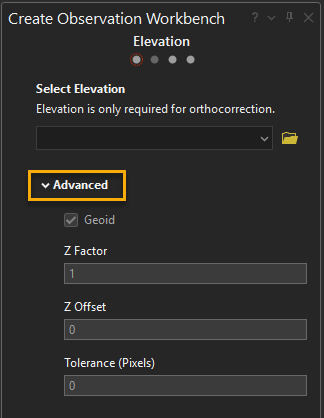
Geoid—Applies the geoid correction to the z-values in elevation datasets that use orthometric heights. Select Geoid correction for compatibility with satellite RPCs which require ellipsoidal heights.
Z Factor—Value used to rescale to meters, if the input elevation dataset uses vertical units other than meters.
Z Offset—Base value added to elevation values in a DEM. Use to offset elevation values that do not start at sea level.
Tolerance—Maximum tolerable error in the geometric function, given in number of pixels.
Click Next to continue and add observation layers.
Optionally, choose existing observation layers or create new observation layers.
Click Browse
to select feature layers from your data location.Note:
You must have permissions to edit the chosen feature classes. These feature classes are modified as part of the observation workflow and two attribute fields,
LabelandAnalyst Comment, are appended to the attribute table of each feature class.Expand Add a new observation layer to create new feature classes.
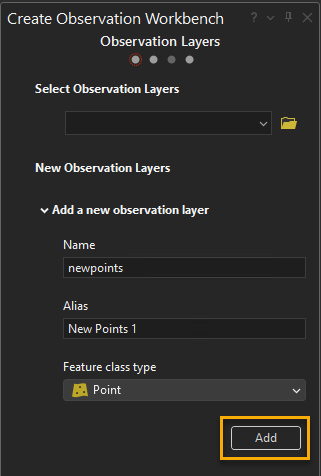
Type a Name for the new feature class. Optionally, add an Alias to display in the workbench.
Click Feature class type to choose the type of observation layer to create.
Point
Line
Polygon
Multipoint
Click Add.
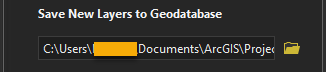
The new observation layer is listed under New Observation Layers, and the default output location for all new layers is shown under Save New Layers To Geodatabase. You may modify the location to point to different file geodatabase or enterprise geodatabase by clicking Browse
.
Click Next to review your workbench inputs.
Review the summary and create the workbench.
Review your input parameters on the Summary page. Look for any warning messages that identify a problem that needs to be addressed. Click Previous to return to pages that contain warnings or to make desired changes.
Click Finish to create the new workbench.
Create an Observation Workbench from within an open project.
Creating a new workbench from within a project allows you to browse to your data sources, with the additional option of selecting data sources from the Contents of an active map.
Warning:
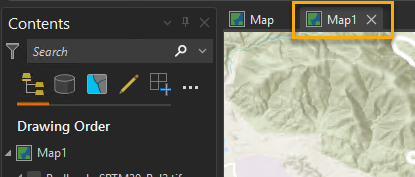
Changing the active map after selecting map inputs will clear all map inputs from Create Observation Workbench fields.
To make a map active, click the tab at the top of the map.
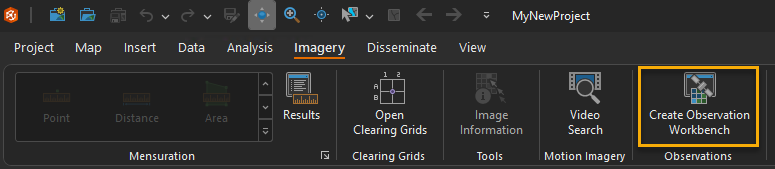
From within an open AllSource project,click Create Observation Workbench on the Imagery tab.
The Create Observation Workbench pane opens.
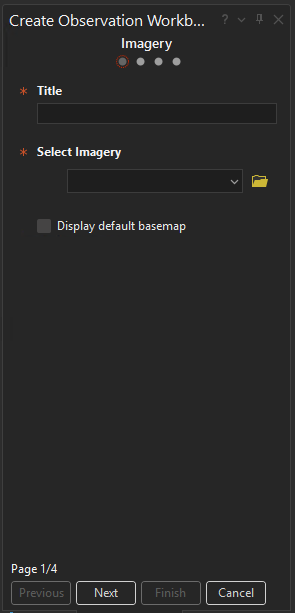
Title your workbench and select image data (required).
Type a title for the new workbench.
Click Browse
to choose one or more images from your data location, or click on the drop-down arrow to select imagery in an active map.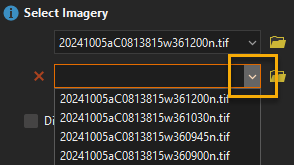
Click Display default basemap to add a basemap in the new workbench. Basemaps are not included by default.
Click Next to continue.
Important:
Orthorectification can only be performed on an image with supported sensor model information, and only if elevation data is provided in the next step. Images without the prerequisites will be included in the output map, but not orthorectified.
Select raster elevation data (required to corrected imagery).
Click Browse
to choose from your data location, or click on the drop-down arrow to select elevation in an active map.Elevation will be displayed in the new workbench and is used to orthorectify sensor model images for which the elevation fully overlaps.
Optionally, expand Advanced to change elevation data parameters for the selected elevation layer.
Geoid—Applies the geoid correction to the z-values in elevation datasets that use orthometric heights. Select Geoid correction for compatibility with satellite RPCs which require ellipsoidal heights.
Z Factor—Value used to rescale to meters, if the input elevation dataset uses vertical units other than meters.
Z Offset—Base value added to elevation values in a DEM. Use to offset elevation values that do not start at sea level.
Tolerance—Maximum tolerable error in the geometric function, given in number of pixels.
Click Next to continue and add observation layers.
Optionally, choose existing observation layers or create new observation layers.
- Click Browse to select feature layers from your data location, or click on the drop-down arrow to select feature layers in an active map.
Note:
You must have permissions to edit the chosen feature classes. These feature classes are modified as part of the observation workflow and two attribute fields,
LabelandAnalyst Comment, are appended to the attribute table of each feature class.Expand Add a new observation layer to create new feature classes.
Type a Name for the new feature class. Optionally, add an Alias to display in the workbench.
Click Feature class type to choose the type of observation layer to create.
Point
Line
Polygon
Multipoint
Click Add.
The new observation layer is listed under New Observation Layers, and the default output location for all new layers is shown under Save New Layers To Geodatabase. You may modify the location to point to different file geodatabase or enterprise geodatabase by clicking Browse
.
- Click Browse
Click Next to review your workbench inputs.
Review the summary and create the workbench.
Review your input parameters on the Summary page. Look for any warning messages that identify a problem that needs to be addressed. Click Previous to return to pages that contain warnings or to make desired changes.
Click Finish to create the new workbench.
Adding Data to a Workbench
You may add additional data layers to the workbench after it is created. One way of adding data to the workbench is from the Catalog pane.
On the View tab, click Catalog Pane
 .
.The Catalog pane opens to a list of project items.
In the Catalog pane, browse to or search for layers in your project, on your computer or network, or in the active portal to add to your workbench.
Right-click a layer and select Add To Current Map or drag the selected layers onto the active workbench view.
Learn about other ways of adding data layers to a map.
Note:
Imagery added to an existing workbench will display but will not be automatically orthorectified.