ArcGIS for Autodesk Forma user interface
The main components of the user interface in the ArcGIS for Autodesk Forma extension are the Sign in window, Layers, Add layers, Attributes, and the Information tabs. Explore the sections below sequentially to gain a comprehensive understanding of each.
Sign in window
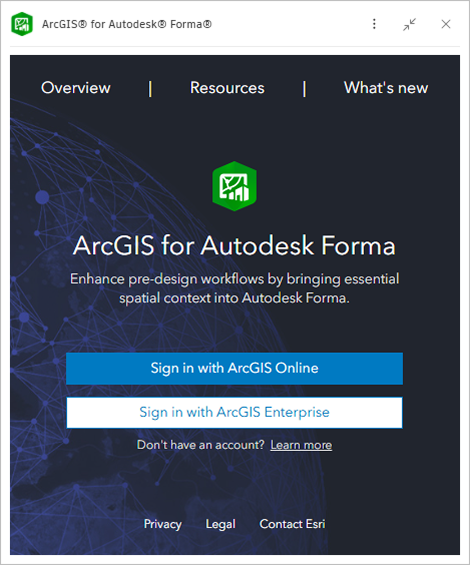
The Sign in window is the default page that opens in the ArcGIS for Autodesk Forma extension and contains links to the Overview, Resources, and What's new pages along the top ribbon. Select any of these links to get additional information on the latest features and functionality of the extension.
The main display of this window contains the Sign in button for ArcGIS Online users and the Get access button for ArcGIS Enterprise users. See sign in to your ArcGIS account to learn more.
Layers tab
After successfully signing in, the extension opens to the Layers tab ![]() . This page serves as a central location for organizing and displaying ArcGIS layers added to your Forma Site Design. Users can perform a variety of tasks here such as import the added layers as Forma Site Design elements, turn on or off visibility of layers, refresh the layer with the latest updates from ArcGIS, or delete the layers.
. This page serves as a central location for organizing and displaying ArcGIS layers added to your Forma Site Design. Users can perform a variety of tasks here such as import the added layers as Forma Site Design elements, turn on or off visibility of layers, refresh the layer with the latest updates from ArcGIS, or delete the layers.
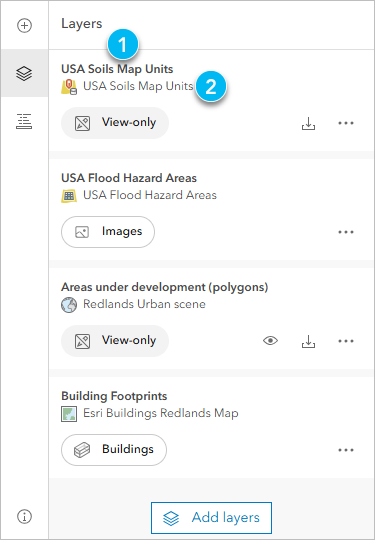
The following table lists the user interface elements of the Layers tab:
|
Element |
Description |
|---|---|
|
|
Layer name refers to the name of the ArcGIS layers added. |
|
|
Item name refers to the name of the item the ArcGIS layer belongs to. |
|
|
The Import to Forma button allows you to import view-only layers into Forma Site Design as either Generic Once imported, the layer becomes a Forma Site Design element. |
|
|
The View-only and Images chips indicate whether an item has been added as view-only or as an image. All layers, except imagery layers, are added as view-only layers. When a View-only layer is imported into Forma Site Design, the chip will update to display the selected import option. |
|
|
The Item types icons indicate the type of GIS data added to Forma Site Design. |
|
|
The Show layer and Hide layer buttons allow you toggle the visibility of GIS layers in Forma Site Design. |
|
|
The More button allows you to Refresh |
|
|
The Add layers button directs you to the Add layers tab |
See import ArcGIS data into Forma Site Design to learn more.
Add layers tab
The Add layers tab ![]() stores the content that is available to add to your Forma site. Users can select items from within My content, My favorites, My groups, My organization, Living Atlas, and ArcGIS Online repositories and can analyze and add the layers listed within. The ability to refine content on this tab allows users to focus their search on specific folders, item types, or content within the site boundary.
stores the content that is available to add to your Forma site. Users can select items from within My content, My favorites, My groups, My organization, Living Atlas, and ArcGIS Online repositories and can analyze and add the layers listed within. The ability to refine content on this tab allows users to focus their search on specific folders, item types, or content within the site boundary.
For best practice on configuring your own data for use in the ArcGIS for Autodesk Forma extension, see curate data for ArcGIS for Autodesk Forma.
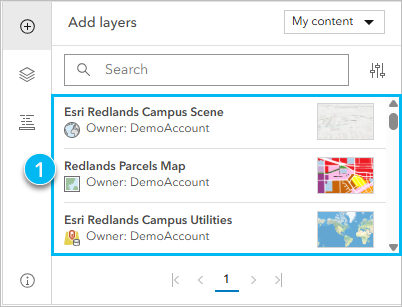
The following table lists the user interface elements of the Add layers tab:
|
Element |
Description |
|---|---|
|
|
The Items list displays content that can be used in Forma Site Design. Selecting an item will display its available layers, the layer type, and how many features from each layer are contained within the extent of the Forma site. |
|
|
The extension defaults to display items from the My content collection of your ArcGIS Online account. Select the caret icon to open the list of other available collections such as My favorites, My groups, My organization, Living Atlas, and ArcGIS Online. |
|
|
Search allows you to enter keywords for the item name you want to view or add to the Forma site. Click the Clear button |
|
|
The Refine content button will open a side panel once selected and allows you to sort content and apply filters such as Item type or the Only show content within the site toggle. Note:You can refine by Folders when searching the My content collection. You can refine by My Groups when searching the My groups collection. Support included for filtering by Group categories if they exist. You can refine by top-level Categories on general topics, and more specific subcategories when searching the My content, My favorites, My organization, and Living Atlas collections. Each Living Atlas category comes with a content summary. |
|
|
The Page navigator buttons allow you to move between pages in the Items list. |
See add GIS layers to an Autodesk Forma site to learn more.
Attributes tab
The Attributes tab ![]() allows you to explore ArcGIS attributes of the imported features. Select any imported feature within the Forma site to load its attributes in ArcGIS for Autodesk Forma.
allows you to explore ArcGIS attributes of the imported features. Select any imported feature within the Forma site to load its attributes in ArcGIS for Autodesk Forma.
Note:
Attributes are not currently supported for imagery layers.

The following table lists the user interface elements of the Attributes tab:
|
Element |
Description |
|---|---|
|
|
The Feature name and Layer name of the selected element. |
|
|
The Attributes table displays all available metadata for the selected element. Users can scroll through the field entries to find valuable information that pertains to their work. |
|
|
The Flash selection button is a tool to highlight the selected element in the Forma site, allowing users to visualize and focus on the specific feature while examining its attributes. |
|
|
The Collapsed and Expanded buttons allow you to open or close the attributes for selected elements. Note:When multiple elements are selected, each element is collapsed by default in the Attributes tab. |
See view imported ArcGIS layer attributes to learn more.
Information tab
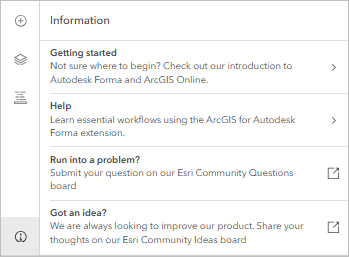
The Information tab ![]() contains Getting started and Help options designed to assist you in navigating and using the ArcGIS for Autodesk Forma extension effectively.
contains Getting started and Help options designed to assist you in navigating and using the ArcGIS for Autodesk Forma extension effectively.
This tab also contains links to our Esri Community Questions and Ideas boards. You can utilize these feedback mechanisms to submit any questions related to problems you are encountering or if you have any suggestions for improving the ArcGIS for Autodesk Forma extension.
Now that you are familiar with the ArcGIS for Autodesk Forma extension user interface, you can add GIS layers to an Autodesk Forma site.