Edit provenance in your knowledge graph
Provenance can be added to describe where information in the knowledge graph originated. Each provenance record associates the value stored in a property of an entity or a relationship with a specific source.
A property of an entity or a relationship can have many provenance records because many sources can confirm the same piece of information. Similarly, one source can provide provenance for many properties of different entities and relationships.
For example, an entity can have many documents where one document is a birth certificate. Provenance records can indicate which properties of a Person entity were derived from the birth certificate such as their name and date of birth. Additional provenance records can associate the same birth certificate document with properties of HasChild relationships that identify other Person entities as parents. Additional documents such as a driver's license can also provide provenance for a Person entity's name, for example.
You can customize the details captured in a provenance record. For example, you can add a property that captures the level of confidence associated with the information provided by a source.
The ability to capture provenance is not enabled by default. You can enable it when you create a knowledge graph with ArcGIS Enterprise 12.0. For an existing knowledge graph, you can enable provenance in the Enterprise portal. The Provenance tab only appears in the knowledge graph view for entities and relationships when it is enabled.
Add a provenance record
Add a provenance record to define the source of the information stored in a property of a single entity or a relationship. The supported source types are Document, URL, and String.
Document—A provenance record can reference a document entity that was previously added to the knowledge graph.
URL—A provenance record can reference a website or a file on the internet accessed by a URL, or a file on the network accessed by a file path. It is recommended that you reference files by providing a UNC path or a URL to a location from which the file is available to everyone working with the knowledge graph such as a URL for a document shared in Microsoft OneDrive or Microsoft SharePoint. Files on a local drive will not be accessible.
String—In some cases, the source of the information is not readily accessible as a document in the knowledge graph, on the internet, or on the network. In these cases, you can add a provenance record where the source is text that comprises the source material itself or provides instructions for accessing the source material, for example.
As you view the properties of an entity or relationship, you can define the source of a property using the Manage Provenance modal.
Note:
You can only manage provenance for entities and relationships with editable properties.
Select the entity or relationship.
In the Knowledge Graph Contents pane—Select the type of entity or relationship. On the records list pane, click the specific entity or relationship, or use the Filter box at the top of the pane, and, on the context toolbar, click Edit
 .
.In the Link Chart Contents pane—Select and entity or relationship, and on the context toolbar, click Edit
.In the Map Contents pane—Select and entity or relationship, and on the context toolbar, click Edit
. Optionally, open the map record table, select a record from the table, and on the context toolbar, click Edit .From a data card
 —Select the entity or relationship data card from the Project Contents pane, and on the context toolbar, click Edit .
The Edit pane opens.
Under the Properties header, click Provenance
 .
.The Provenance pane opens. Any existing provenance records for properties are listed.
Click Add Provenance
The Add Provenance modal appears.
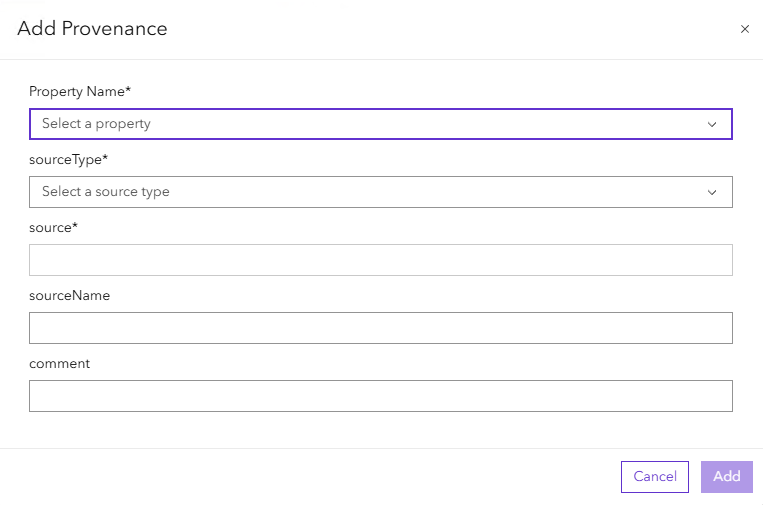
Click the Property Name dropdown and select the property to which you want to add a provenance record.
Click the Source Type dropdown and select type of inforamtion for the new provenance record.
Click the source field and enter the appropriate value for the new provenance record.
Document—Search for the document by typing a complete or partial word from the display name or a property of the document entity. Documents with property values that match or partially match the text you typed appear in a list. Hover over a document to determine which is the correct source and click it in the list.
URL—Type a URL or a network file path.
String—Type the source information.
Optionally, click in the sourceName text box and type the title of the website or file name of the source.
Optionally, click in the comment text box and type information about how the source material defines the property value.
Click Add
The provence record is added as a pending edit in the Provenance pane.
In the Edit pane, click the Apply button.
The provenance record is added to the property.
Add default provenance
You can set a default provenance source for all edits made to properties. Setting default provenance allows you to add the same provenance source to all newly edited properties of any entity or relationship in your project.
Utilizing default provenance is an efficient way to define the same source information of a property for multiple entities or relationships. For example, setting a default provenance source as a birth certificate document will create provenance records for all property edits. In this way you can edit the name or date of birth for multiple entities without creating provenance records individually. You can edit or delete the default provenance at anytime.
Note:
Default provenance will apply to any edits made in the project until it is removed.
Define the default provenance source for all property edits using the Default Provenance modal.
On the context toolbar, click Edit
The Edit pane opens.
In the Overview heading, click default provenance

The Default Provenance modal appears.
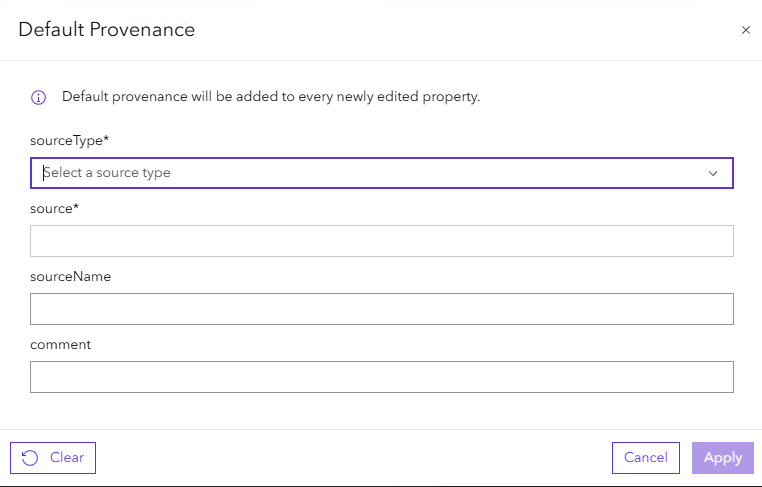
Click the Source Type dropdown and select type of information for the new provenance record.
Click the source field and enter the appropriate value for the new provenance record.
Document—Search for the document by typing a complete or partial word from the display name or a property of the document entity. Documents with property values that match or partially match the text you typed appear in a list. Hover over a document to determine which is the correct source and click it in the list.
URL—Type a URL or a network file path.
String—Type the source information.
Optionally, click in the sourceName text box and type the title of the website or file name of the source. The value will appear as the title of the default provenance in the Edit pane.
Optionally, click in the comment text box and type information about how the source material defines the property value.
Click Apply.
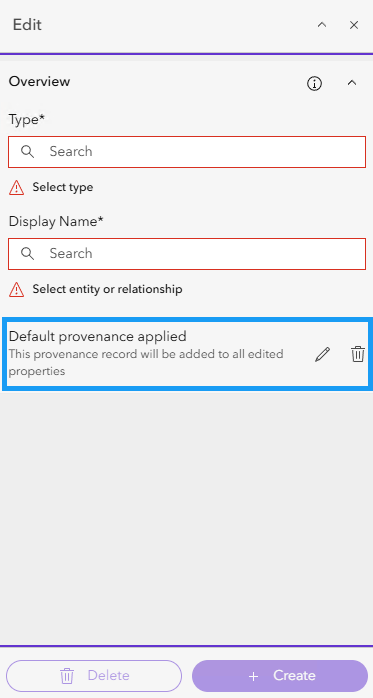
The default provenance is applied in the project. All edited properties will have a provenance record created as defined by default provenance.
Optionally, on the Edit pane, click Edit
 . Repeat steps 3 through 7 above to edit the default provenance.
Optionally, on the Edit pane, click Delete
 .
.The default provenance is removed from the project.
Note:
You do not need to select an entity or relationship before defining the default provenance. However, default provenance can be defined while an entity or relationship is selected.
Modify and delete provenance records
You can edit or delete existing provenance records for properties of entities and relationships.
Select the entity or relationship.
In the Knowledge Graph Contents pane—Select the type of entity or relationship. On the records list pane, click the specific entity or relationship, or use the Filter box at the top of the pane, and, on the context toolbar, click Edit
.In the Link Chart Contents pane—Select and entity or relationship, and on the context toolbar, click Edit
.In the Map Contents pane—Select and entity or relationship, and on the context toolbar, click Edit
. Optionally, open the map record table, select a record from the table, and on the context toolbar, click Edit .From a data card
—Select the entity or relationship data card from the Project Contents pane, and on the context toolbar, click Edit .
The Edit pane opens.
Under the Properties header, click Manage Provenance
.The Provenance tab expands. Any existing provenance records for editable properties are listed.
Hover over the provenance record for the property you want to modify.
Click Edit
.The Update Provenance modal appears.
Modify the provenance record values as needed and click Update
The modified provenance record is added as a pending edit.
Optionally, modified provenance record and click Undo

The provenance record edits are discarded.
Optionally, hover over the provenance record for the property you want to delete.
Click Delete
The provenance record is added as a pending delete.
In the Edit pane, click the Apply button.
The pending edited is applied and the provenance record is modified or deleted.