Set the time view for LRS layers
 Available with the Linear Referencing license.
ArcGIS Linear Referencing data is time-aware. Before using the Set Time Filter tool, you must first enable time for an LRS layer or for all LRS layers in a map.
Set the time view for an LRS layer
To configure time support for an LRS layer that has been added to a map in ArcGIS Pro, complete the following steps:
Start ArcGIS Pro and open a project with LRS data in the map.
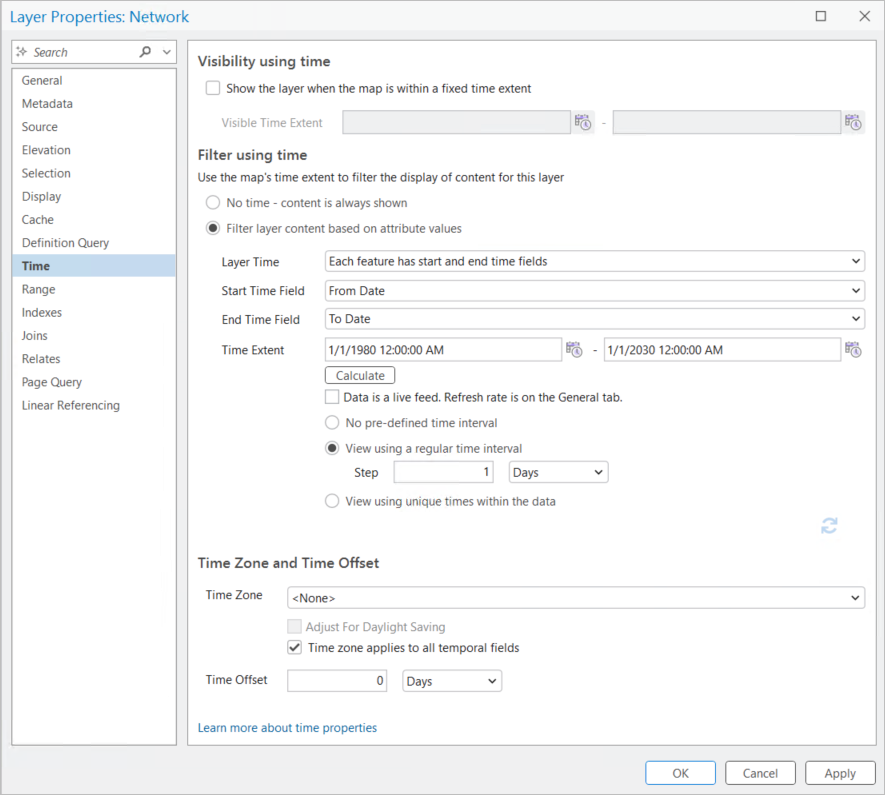
Double-click an LRS layer in the Contents pane to open the Layer Properties dialog box.
On the Time tab, under Filter using time, choose the Filter layer content based on attribute values option.
Click the Layer Time drop-down arrow and choose the Each feature has start and end time fields option.
Set the Start Time Field value to the corresponding field in the layer that contains the starting date.
Set the End Time Field value to the corresponding field in the layer that contains the ending date.
Set the Time Extent value to the date range of the data.
Set Time Zone to the default value.
Set the time view for LRS layers in a group
Enable time for LRS layers such as networks, events, and calibration points by setting their start and end dates. You can then compare a feature at a given time.
To configure time support for all LRS layers in a map, complete the following steps:
Start ArcGIS Pro and open a project.
Add LRS layers such as networks, events, intersections, and calibration points to the map.
On the Linear Referencing tab, in the Tools group, click Enable Time
 .
The tool enables time only for the network, event, intersection, and calibration point layers.
The tool does not enable time for centerlines, redline layers, or tables.
The tool populates the following parameters on the Time tab in the Layer Properties dialog box:
Layer Time—Each feature has start and end time fields
Start Time Field—Start date field of the LRS layer
End Time Field—End date field of the LRS layer
Time Extent—Calculated using the following formula considering all the LRS layers in the map:
From Date—Min (earliest date - 20 years, today's date - 20 years)
To Date—Max (furthest date + 20 years, today's date + 20 years)
The following table shows examples of the formula using a date of 10/10/2019:
Input (considering all LRS layers)
Output (applied to all LRS layers)
#
Min (From Date)
Max (To Date)
From Date
To Date
1
1/1/2000
Null
1/1/1980
10/10/2039
2
1/1/2000
1/1/2030
1/1/1980
1/1/2050
3
Null
Null
10/10/1999
10/10/2039
4
1/1/2000
Null
10/10/1999
10/10/2039
When the Enable Time button is active, time is enabled for all LRS layers in the map and any LRS layers subsequently added to the map. ArcGIS Pro preserves the time properties enabled on the map when you save the project.
The contextual Time tab of the ribbon and the time slider appear after enabling time.
Tip:
The Enable Time button becomes active the first time you click it. Click the active button to disable time for the LRS layers.
After using the Set Time Filter tool, you can manually change the time properties for selected map layers on the Time tab in the Layer Properties dialog box.