Create a 3D roof in a stereo map
When using the Create 3D Geometry tool  in a stereo map to create 3D roofs, you can set the z-value to the elevation of an image and extrude it to the ground in one step. This tool is available in the Create Features pane with editing templates for multipatch or 3D object feature layers.
Create a flat roof
To create flat roof, complete the following steps:
Click Snapping
 on the status bar and turn on Snapping.
To learn about snapping and its settings, see Use snapping.
Put on stereoscopic 3D cyan/red glasses.
Click the ribbon Edit tab. In the Features group, click Create
 .
.The Create Features pane appears.
Click the Stereo view to make it the current view.
Click a multipatch or 3D object feature template in the Create Features pane.
Click the Create 3D Geometry tool
.The construction toolbar appears in the active Stereo view.
Click the Geometry Templates drop-down arrow and choose the Flat Roof template tool
 .
.Set the ground elevation and enable the tool to extrude the roof to the ground.
Scroll the mouse wheel until the stereo cursor visually appears on the ground and press Ctrl+H.
The elevation is set to the ground.
Click Extrude Roof
 on the toolbar and confirm that it is enabled.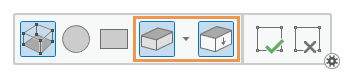
Hover over a building roof corner and scroll to the height of the roof.
The updated z-value of the stereo cursor's location appears in the coordinate display at the bottom of the stereo map view.
Click one of the corners of the roof image to start the sketch, and click the remaining corners.
Hover over the first corner and click it when the snapping constraint changes to a circle.
A building with a flat roof appears over the building image.
Click Finish
 or press F2 to create the feature.
Create a gable roof
To create a gable roof, complete the following steps:
Click Snapping
on the status bar and turn on Snapping.To learn about snapping and its settings, see Use snapping.
Put on stereoscopic 3D cyan/red glasses.
Click the ribbon Edit tab. In the Features group, click Create
.The Create Features pane appears.
Click the Stereo view to make it the current view.
Click a multipatch or 3D object feature template in the Create Features pane.
Click the Create 3D Geometry tool
.The construction toolbar appears in the active Stereo view.
Click the Geometry Templates drop-down arrow and choose the Gable Roof template tool
 .
.Set the ground elevation and enable the tool to extrude the roof to the ground.
Scroll the mouse wheel until the stereo cursor visually appears on the ground and press Ctrl+H.
The elevation is set to the ground.
Click Extrude Roof
on the toolbar and confirm that it is enabled.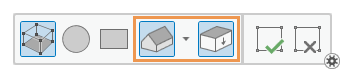
Hover over a building roof corner and scroll to the height of the roof.
The updated z-value of the stereo cursor's location appears in the coordinate display at the bottom of the stereo map view.
Click one of the corners of the roof image to start the sketch, and click the remaining corners.
Hover over the first corner and click it when the snapping constraint changes to a circle.
Yellow lines outline the 3D gable roof feature as it appears over the building image.
To switch the orientation of the ridge line between the lengthwise or crosswise direction, press N.
To change the pitch of the roof, hover over the yellow top ridge line and scroll the mouse wheel.
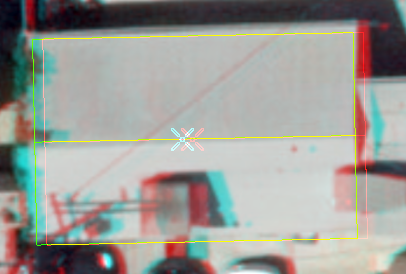
3D gable roof feature in a stereo map view showing the pointer over the roof ridge line. Click Finish
or press F2 to create the feature.
Create a hip roof
To create a hip roof, complete the following steps:
Click Snapping
on the status bar and turn on Snapping.To learn about snapping and its settings, see Use snapping.
Put on stereoscopic 3D cyan/red glasses.
Click the ribbon Edit tab. In the Features group, click Create
.The Create Features pane appears.
Click the Stereo view to make it the current view.
Click a multipatch or 3D object feature template in the Create Features pane.
Click the Create 3D Geometry tool
.The construction toolbar appears in the active Stereo view.
Click the Geometry Templates drop-down arrow and choose the Hip Roof template tool
 .
.Set the ground elevation and enable the tool to extrude the roof to the ground.
Scroll the mouse wheel until the stereo cursor visually appears on the ground and press Ctrl+H.
The elevation is set to the ground.
Click Extrude Roof
on the toolbar and confirm that it is enabled.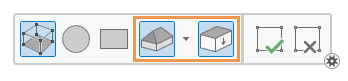
Hover over a building roof corner and scroll to the height of the roof.
The updated z-value of the stereo cursor's location appears in the coordinate display at the bottom of the stereo map view.
Click one of the corners of the roof image to start the sketch, and sketch the roof outline.
Hover over the first corner and click it when the snapping constraint changes to a circle.
Yellow lines outline the 3D hip roof feature as it appears over the building image.
To change the pitch of the roof, hover over a yellow top ridge line and scroll the mouse wheel.
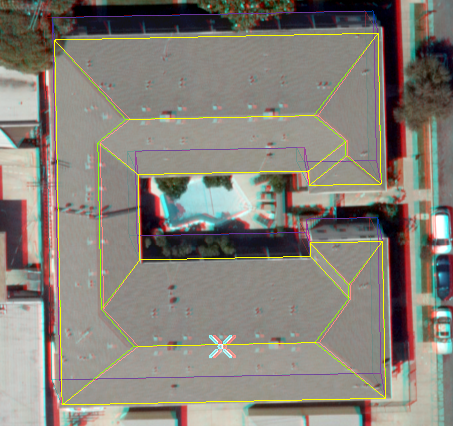
3D hip roof feature in a stereo map view showing the pointer over the roof ridge line. Click Finish
or press F2 to create the feature.
Create a mansard roof
To create a mansard roof, complete the following steps:
Click Snapping
on the status bar and turn on Snapping.To learn about snapping and its settings, see Use snapping.
Put on stereoscopic 3D cyan/red glasses.
Click the ribbon Edit tab. In the Features group, click Create
.The Create Features pane appears.
Click the Stereo view to make it the current view.
Click a multipatch or 3D object feature template in the Create Features pane.
Click the Create 3D Geometry tool
.The construction toolbar appears in the active Stereo view.
Click the Geometry Templates drop-down arrow and choose the Mansard Roof template tool
 .
.Set the ground elevation and enable the tool to extrude the roof to the ground.
Scroll the mouse wheel until the stereo cursor visually appears on the ground and press Ctrl+H.
The elevation is set to the ground.
Click Extrude Roof
on the toolbar and confirm that it is enabled.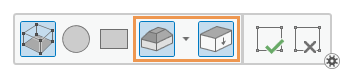
Hover over a building roof corner and scroll to the height of the roof.
The updated z-value of the stereo cursor's location appears in the coordinate display at the bottom of the stereo map view.
Click one of the corners of the roof image to start the sketch, and sketch the roof outline.
Hover over the first corner and click it when the snapping constraint changes to a circle.
Move the pointer to show the flat top of the roof.
Yellow lines outline the 3D mansard roof feature as it appears over the building image.
To change the pitch of the roof, hover over a yellow top ridge line and scroll the mouse wheel.
Move the pointer to show the flat top of the roof.
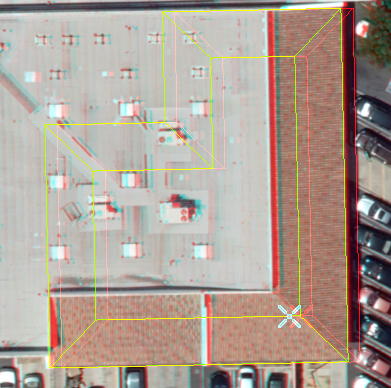
3D mansard roof feature in a stereo map view showing the pointer over the roof ridge line. Click Finish
or press F2 to create the feature.
Create a dome roof
To create a dome roof, complete the following steps:
Click Snapping
on the status bar and turn on Snapping.To learn about snapping and its settings, see Use snapping.
Put on stereoscopic 3D cyan/red glasses.
Click the ribbon Edit tab. In the Features group, click Create
.The Create Features pane appears.
Click the Stereo view to make it the current view.
Click a multipatch or 3D object feature template in the Create Features pane.
Click the Create 3D Geometry tool
.The construction toolbar appears in the active Stereo view.
Click the Geometry Templates drop-down arrow and choose the Dome Roof template tool
 .
.Set the ground elevation and enable the tool to extrude the roof to the ground.
Scroll the mouse wheel until the stereo cursor visually appears on the ground and press Ctrl+H.
The elevation is set to the ground.
Click Extrude Roof
on the toolbar and confirm that it is enabled.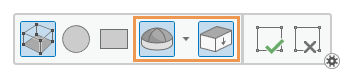
Hover over a building roof corner and scroll to the height of the roof.
The updated z-value of the stereo cursor's location appears in the coordinate display at the bottom of the stereo map view.
Click one of the corners of the roof image to start the sketch, and click the remaining corners.
Hover over the first corner and click it when the snapping constraint changes to a circle.
A building with a dome roof appears over the building image.
To change the pitch of the roof, hover over the yellow top ridge line and scroll the mouse wheel.
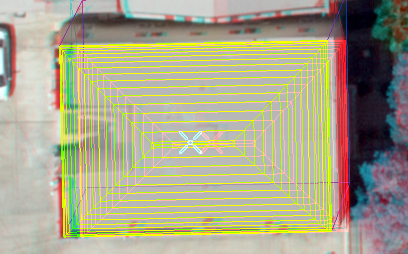
3D dome roof feature in a stereo map view showing the pointer over the roof ridge line. Click Finish
or press F2 to create the feature.