Federate a Velocity site with a portal in ArcGIS Enterprise
After installing ArcGIS Velocity, creating a site, and configuring certificates, you can configure the site with a portal in ArcGIS Enterprise. You must federate the site with the portal and designate it as the portal's Velocity site.
Federating a Velocity site with your portal integrates the security and sharing models of your portal with those of the server site. When you federate, the portal's identity store controls access to Velocity based on portal members, roles, and permissions.
Note:
Velocity cannot function as the hosting server for a portal; you must have already federated an ArcGIS Server site and designated it as the portal's hosting server. When you federate a Velocity site with the portal, ensure that the portal and the hosting server are running Enterprise 12.2 or later.
Federate a Velocity site with the portal
To federate a Velocity site with your portal, complete the following steps:
Sign in to the Enterprise portal as an administrator.
Note:
You must connect to the portal in Enterprise through ArcGIS Web Adaptor. Do not use the portal internal port 7443. For example, use
https://webadaptorhost.domain.com/webadaptorname/home.Click Organization > Settings > Servers.
Click Add Server Site.
Provide the following information:
Service URL—The URL used by external users when accessing the Velocity site. For example,
https://velocity.example.com:7143/arcgis. If Velocity is accessed through a reverse proxy, use the reverse proxy URL, for example,https://reverseproxy.example.com/velocity.Administration URL—The URL used to access the Velocity site when performing administrative operations on the internal network:
https://velocity.example.com:7143/arcgis.Note:
The Administration URL setting must be a URL that the portal can use to communicate with Velocity.
Username—Provide the name of the primary site administrator account set when installing Velocity.
Password—Provide the password of the primary site administrator account.
The Velocity server role is automatically applied.
Click Save.
Continue to access Velocity.
Add Velocity to the portal in Enterprise app launcher
After configuring Velocity with the portal in Enterprise, complete the following steps to create a customized Velocity app and add it to the portal in Enterprise app launcher:
Sign in to the Enterprise portal as an administrator.
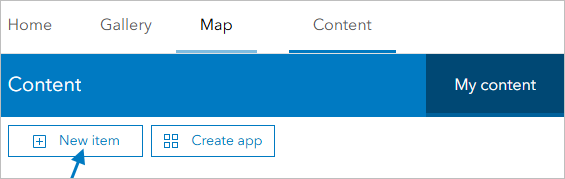
Click Content and click the My content tab.
Click the New item option to open the New item dialog box.
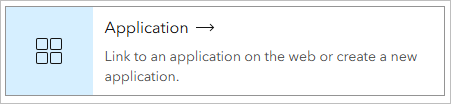
In the New item dialog box, click the Application option to open the Create an application dialog box.
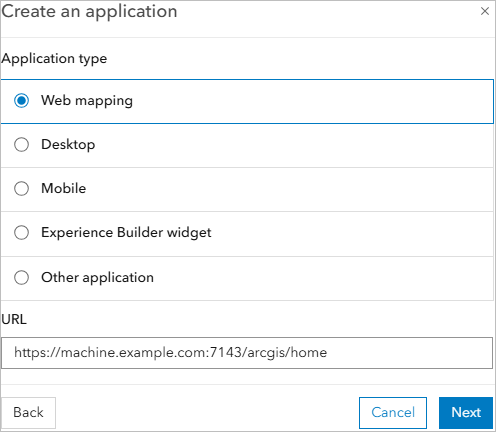
In the Create an application dialog box, complete the following:
For the Application type parameter, keep the default option for Web mapping.
For the URL parameter, type your Velocity app URL. For example,
https://velocity.example.com:7143/arcgis/home. If Velocity is accessed through a reverse proxy, use the reverse proxy URL, for example,https://reverseproxy.example.com/velocity/home.Click Next.
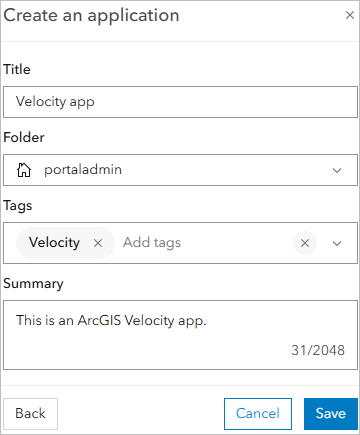
For the Title parameter, type a title for the web app.
For the Folder parameter, choose the appropriate folder.
For the Tags parameter, type one or more tags.
For the Summary parameter, type a summary of the web app.
Click Save.
Click Content and click the My content tab.
Find the new web app you created and click it.

On the overview page of your new web app, click the Settings tab.
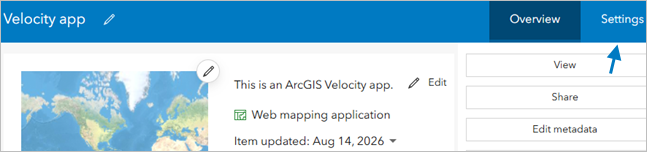
On the Settings page, scroll to the Web mapping application section or click the Web mapping application tab in the settings pane.
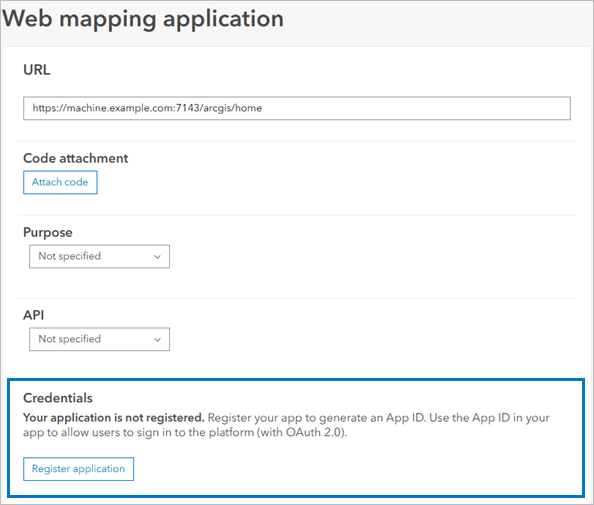
In the Web mapping application section, complete the following:
Browse to the Credentials section and click Register application to open the register dialog box.
For the Redirect URLs parameter, type your Velocity app redirect. For example,
https://velocity.example.com:7143/arcgis/home. If Velocity is accessed through a reverse proxy, use the reverse proxy URL, for example,https://reverseproxy.example.com/velocity/home.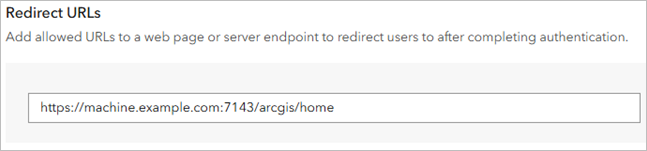
Click Register.
Click Organization and click the Settings tab.
In the settings pane, click Security.
On the Security page, click Apps to jump to the Apps section of the page.
Under the Approved apps section, click the Add approved app option.
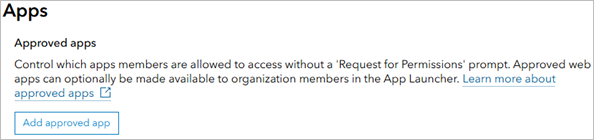
Search for the Velocity web app you created to add to the app launcher and click Save.
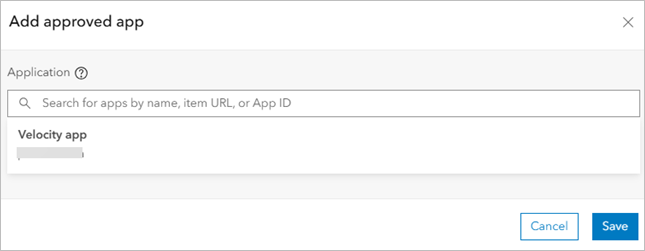
Refresh your web browser.
Click the Apps icon
 to access the app launcher.
The new Velocity app appears in the app launcher.
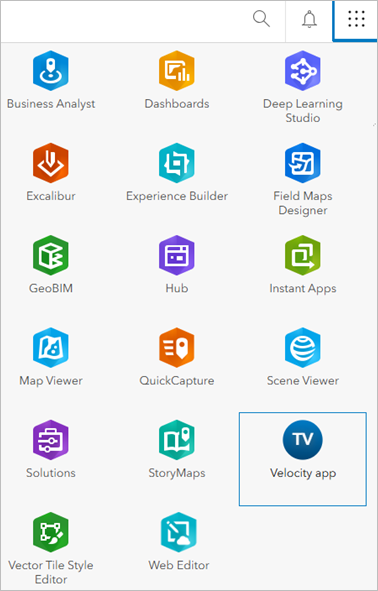
Click the newly added web app to open Velocity.
Manage app visibility in the portal app launcher
You can control which web apps show in the portal app launcher. Share the web app item with a group if you want to limit the app launcher access to a specific set of users in that group. Only members of that group can view the app in their app launcher. Sharing with specific groups restricts access to a smaller, more focused set of people.
Share the web app item with the entire organization if you want it to appear in the app launcher for everyone in your organization. Access to Velocity is still constrained by assigning specific privileges.
Note:
Once web apps are added to the app launcher, members see only those apps that they can access. If a web app item previously accessible to a member becomes unavailable because it no longer exists or is no longer shared with them, the change is reflected in the member's app launcher gallery within 10 minutes of it becoming unavailable. If an app you add to the app launcher later becomes inaccessible by your organization or has its app URL changed, the app launcher notifies you that some apps must be updated. To remove inaccessible apps or review URL changes, click More options for the app and click Remove or Edit.