Reality Server clients and workflow
You use ArcGIS Reality Server through a client application, which can be ArcGIS Pro, ArcGIS API for Python, Reality Web App (beta) or ArcGIS REST API. The reality mapping workflows are defined through the client, and the client submits the tasks to Reality Server for processing. Reality Server runs the work using the distributed processing of the site and publishes the resulting products to your portal.
Clients
Each client provides a different way to work with Reality Server. ArcGIS Pro provides reality mapping wizards and tools for submitting jobs to Reality Server. ArcGIS API for Python and ArcGIS REST API support automation and customization. ArcGIS Reality Web App (beta) is a focused web app for processing drone imagery.
The following table compares the clients. Choose the client or combination of clients that best fits your data, your workflow, and the level of control or automation you need.
| Client | Supported imagery | Best for |
|---|---|---|
| ArcGIS Pro | Drone, digital aerial, and satellite | Full-featured wizard for holistic photogrammetric workflow |
| ArcGIS API for Python | Drone, digital aerial, and satellite | Automating repeated workflows, batch processing, and scripting processing in notebooks |
| ArcGIS Reality Web App (beta) | Drone | Streamlined browser-based drone processing |
| ArcGIS REST API | Drone, digital aerial, and satellite | Integrating reality mapping into custom applications and systems |
Reality mapping work is interoperable among the clients. For example, you can create a project and mission in the Web App, process the mission with ArcGIS API for Python and review its products in ArcGIS Pro.
Reality mapping workflow
Regardless of the client, a reality mapping workflow follows the same pipeline illustrated in the diagram below. Each client performs the tasks differently—as wizard steps in Reality Web App, as tools and wizards in ArcGIS Pro, or as methods in ArcGIS API for Python, but the underlying processing on the server is the same.
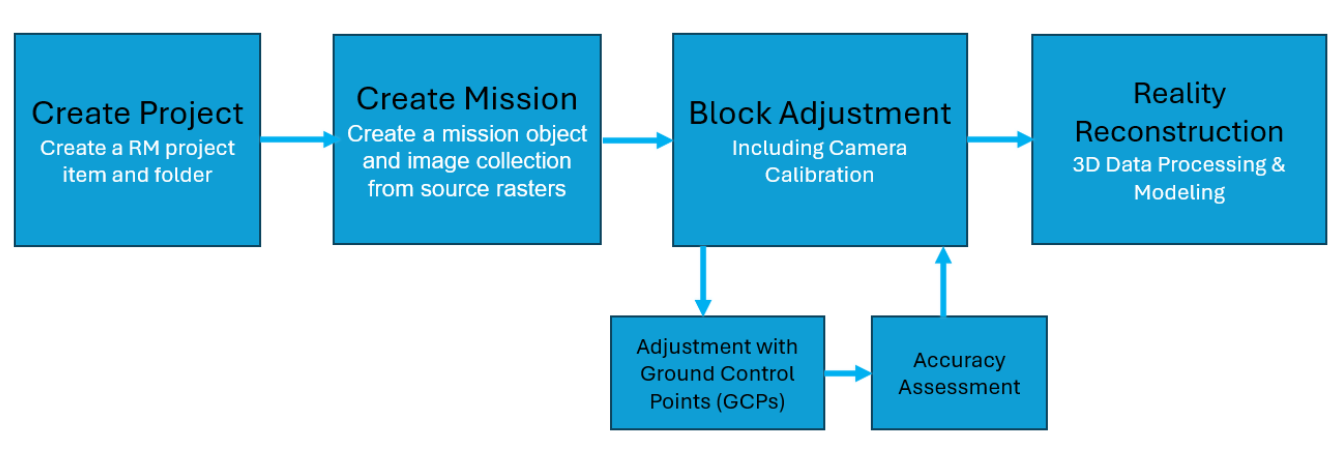
The workflow includes the following stages:
Create a project— A reality mapping project item and folder are created in the portal for the site you are mapping. If you are processing new image acquisition for a site you have mapped before, open the existing project instead. Learn more about projects and missions.
Create a mission— A mission and its image collection are created from the source images of a single data capture session.
Perform adjustment— Tie points are computed across overlapping images, and the camera positions, orientations, and calibration are solved for every image in the mission. The adjustment results are evaluated. Optionally, surveyed GCPs are added and matched to the images, and the adjustment is refined to improve absolute accuracy.
Generate products— Reconstruction uses the adjusted images to generate 2D and 3D products, such as true ortho, DSM, DTM, mesh, point cloud, and Gaussian splats. Learn more about the products Reality Server generates.
When processing finishes, the products are shared to the portal as imagery layers (true ortho, DSM, and DTM), scene layers (mesh), point cloud layers, or gaussian layers, ready to use in maps and scenes and to share with groups in your organization.