Customize global toolbars
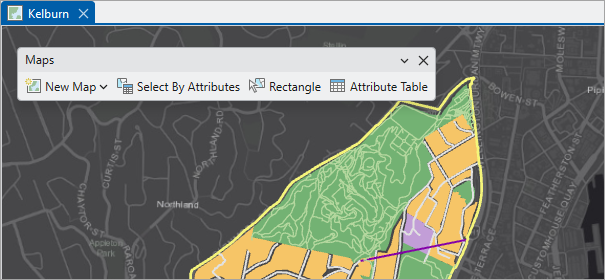
In ArcGIS Pro, most tools are available on the ribbon tabs and in context menus. Similar to view toolbars, global toolbars provide quick access to commonly used commands or tools. Global toolbars can be created, modified, and deleted as needed. Global toolbars are distinct from view toolbars in that they can be docked to any of the four outer edges of the application window and are not bound to a specific view. Additionally, global toolbars can be floated and dragged to any location on your monitor.
Open the Customize Global Toolbars dialog box
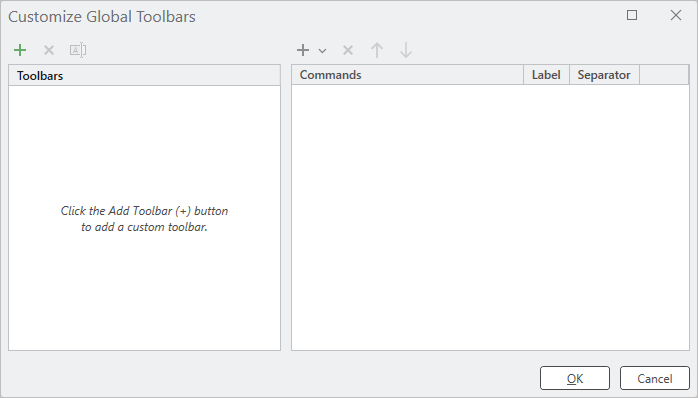
The dialog box for customizing global toolbars can be found on the Help tab on the ribbon. Once the Customize Global Toolbars dialog box is open, you can create custom global toolbars, as well as modify and delete custom global toolbars as needed.
Click the Help tab.
Click Customize Global Toolbars
 to open the dialog box.
Create a new custom global toolbar
As needed, you can create a new custom global toolbar that fits your workflows. For example, suppose you want a toolbar that contains tools relevant to working in both a Map view and an Attribute Table view. You can populate this toolbar with the tools you need, regardless of which views you're working with.
Open the Customize Global Toolbars dialog box.
Click Add toolbar
 .
The Add Toolbar dialog box appears.
Type a name for the toolbar in the Name text box and click OK.
Above the list on the right, click Add command
.The Commands dialog box appears.

By default, the filter on the dialog box is set to All Commands, and you can search for the commands you want to add by name. There are additional filters for the commands list that help you to narrow the list of commands:
Popular Commands—Commands that are regularly used in ArcGIS Pro.
Currently Visible Tabs—Only commands from the tabs currently visible in ArcGIS Pro are in the list of commands.
All Tabs—Commands from all tabs are included in the list.
Popular Geoprocessing Tools—Geoprocessing tools that are regularly used in ArcGIS Pro.
All Geoprocessing Tools—All geoprocessing tools that are available in ArcGIS Pro.
Type a tool name in the Search command(s) to add text box to find the command you want to add to the toolbar.
Click OK to add the tool to the custom toolbar.
The selected command appears in the command list on the dialog box, and on the toolbar.
Labels for commands, as they appear in the toolbar, are enabled by default.
To display a separator before the command, check the Separator box.
Note:
This option is not available for the first command added to a custom global toolbar.
To change the location of the tool on the toolbar, click Move command up one position
 and Move command down one position
 .
Repeat steps 4 through 8 as needed.
Click OK when you are finished creating the toolbar.
The new toolbar appears underneath the ribbon.
Customize an existing global toolbar
Global toolbars that are created can be further customized. For example, suppose you usually work with map views, but a project requires you to work frequently with the catalog view, as well. You can add a new group for tools related to the catalog view, such as metadata editing tools. This can be accomplished by adding the tools to the existing toolbar.
Open the Customize Global Toolbars dialog box. Select the global toolbar you want to customize along the left side of the dialog box.
Above the list on the right, click Add Command
.The Commands dialog box appears.
Search for Edit Metadata. Click the first option in the list of results, then click OK.
Check the Separator box to add a separator before the Edit command.
This helps you see where the customizations you have made are located on the toolbar.
Click OK.
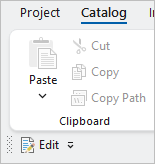
The new tools appear at the end of the toolbar. The toolbar will appear underneath the ribbon.
Add custom headings to organize commands
Where helpful, headings can be added to a toolbar as a visual aid to group related commands or tools together. Suppose you wanted to categorize the Edit Metadata command you just added in the previous example. Adding a new heading can help with the organization of newly-added commands.
Open the Customize Global Toolbars dialog box. Select the global toolbar you want to customize along the left side of the dialog box.
Select the Edit Metadata command that you added previously in the commands menu.
Above the list on the right, click the drop-down arrow next to Add command
button and select New Heading.The Add New Heading window appears.
Type an appropriate name for your new heading. Click OK.
Click OK.
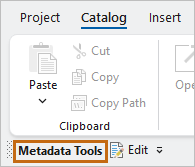
Your new heading should appear to the left of the Edit Metadata command.
Note:
Heading names cannot be edited once added to a toolbar.
Remove commands and headers from global toolbars
As needed, you can remove commands and headers from custom toolbars whenever desired. This allows you to adjust the commands on the toolbars to suit your workflow.
Open the view that contains the toolbar to customize.
Open the Customize Global Toolbars dialog box.
The Customize Global Toolbars dialog box appears.
Click the command you want to remove from the toolbar.
Click Remove command from selected toolbar
 .
The command is removed from the list of commands for the toolbar on the Customize Global Toolbars dialog box.
Click OK.
Change the order of commands and headers on a global toolbar
You can change the order of commands or headers on a toolbar as needed. This allows you to move more frequently used tools to a more prominent location on the toolbar. For example, you can add tools to the toolbar for a table view and change their positions to make them more visible.
Open the Customize Global Toolbars dialog box.
The Customize Global Toolbars dialog box appears.
Click the tool you want to move on the toolbar.
Click Move command up one position
and Move command down one position to adjust the tool's location on the toolbar.The tool's new position is reflected on the Customize Global Toolbars dialog box.
Repeat steps 2 and 3 as needed to adjust the positions of tools on the toolbar.
Click OK when you are done customizing the toolbar.
Toggle the visibility of a global toolbar
Global toolbars can be hidden and displayed again whenever necessary. When a global toolbar is hidden, it can be made visible again from the Customize Global Toolbars window.
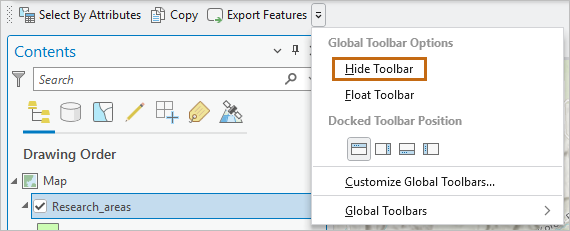
To hide the toolbar, click the toolbar options button on the right of the toolbar and click Hide Toolbar.
The toolbar is not displayed in the application window.
Float a global toolbar
Global toolbars begin in a docked state, but can alternatively be floated and dragged to anywhere on the display that's convenient for your workflows. There are two ways to float a global toolbar.
Click the toolbar options button to the right of the global toolbar you wish to float, then click the Float toolbar button.
Click and drag the toolbar out of its docked position by the thumb.