Modify a mesh layer
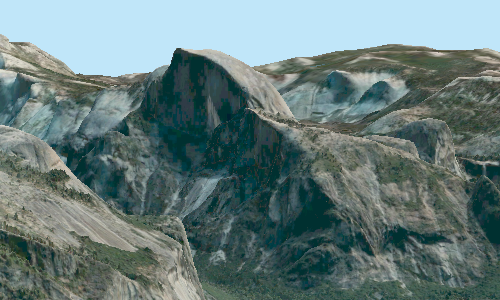
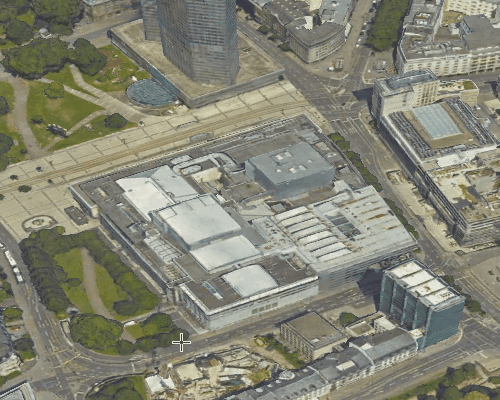
A mesh scene layer or 3D tiles layer is a continuous meshed surface capturing the textured surface of an area. You can bring other GIS content alongside the mesh without re-creating the mesh. The Google Photorealistic 3D Basemap is a mesh layer that appears in Ground and provides both photorealistic textures and elevation values in one global dataset. You can apply a replace modification, for example, to flatten a building and replace it with your own 3D building. Clip, mask, and replace modifications are supported for mesh scene layers and 3D tiles layers. For basemaps such as Google Photorealistic 3D basemap, only replace is available. You can share your modifications in a web scene across the ArcGIS system.
Apply modification to an operational mesh layer
You can add a modification to a mesh layer from the layer properties in the Contents pane or by clicking the Add button ![]() in the Modification group of the Data tab. When added, the modification displays as a sub item underneath the mesh layer in the Contents pane. The modification contains a polygon feature with a coded value domain field named
in the Modification group of the Data tab. When added, the modification displays as a sub item underneath the mesh layer in the Contents pane. The modification contains a polygon feature with a coded value domain field named Modifier that defines whether the polygon is a clip, mask, or replace portion of the mesh layer. When you add modifications, you are not changing the mesh layer directly; rather, you are making modifications based on the polygons in the added modification.
You can import a polygon from an existing feature class. For example, you can import building footprint polygons of an area to create a scenario such as rendering a BIM dataset of a proposed building. After you select the feature layer on the Add Modification dialog box, you can set a default modification operator, or if the imported feature layer has an existing modifier field, you can choose Same as Import.
You can apply modifiers to existing polygons by manually editing the Modifier field in the attribute table or using the Calculate Field tool to batch update multiple polygons. See the Change the modification operator in the attribute table section below for detailed steps. You can also create polygons on which to base the modification using the Clip operation ![]() , Mask operation
, Mask operation ![]() , or Replace operation
, or Replace operation ![]() on the Data tab. See the Edit modification polygons section below for detailed steps.
on the Data tab. See the Edit modification polygons section below for detailed steps.
Apply modification to the Google Photorealistic basemap
Modifications to the Google Mesh layer work similar to modifications to operational layers. You can add a modification from the layer context menu in the Contents pane. After creating the layer, you can import polygons or sketch a new polygon using the editing tools in the Edit tab. The modification contains a polygon feature layer with a coded value domain field named Modifier that defines whether the polygon replaces a portion of the Google Mesh layer. When you import a polygon with a field named Modifier only the polygon feature with the coded value Replace will be applied to the Google Mesh layer. All other features remaining in the polygon layer are shown as all other values in the Contents pane. You can change the value in the polygon attribute table by editing the field or using the Calculate Field tool to update multiple polygons.
Clip
Clip out portions of the mesh to see features below, for example, utility work on gas or water lines in an area. Planners can create a scene in which the mesh is clipped out at a site to expose the water or gas lines below it.
Mask
Use a mask to define an area of interest. Use a polygon and draw only parts of the mesh inside that polygon, for example, to show only a portion of a mesh within the boundaries of the city.

Replace
Replace an area of a mesh based on a 3D polygon. For example, to add constructed buildings, flatten the mesh at the footprint of a building so the new building can be visualized. Create different scenarios of the new construction area and share the scenarios as a web scene to discuss with stakeholders. The mesh flattens to the minimum z-vertex of the modification polygon. This modification is available for the Google Photorealistic 3D basemap.

Add and remove modifications
Follow these steps to add or remove modifications from a mesh.
Add a modification
Complete the following steps to add a modification:
Right-click the mesh layer in the Contents pane and click Modification.
Click Add Modification
 .
.On the Add Modification dialog box, choose either Create new modification or Import from existing polygon feature layer.
If you choose to import a feature class that was previously used as a modification, the scene redraws with the modification applied when the Same as Import operator is selected. For the Google mesh layer, only the replace modification will be applied.
Remove a modification
Complete the following steps to remove a modification:
Right-click the mesh layer in the Contents pane and click Modification.
Click Remove Modification
 .
.The modification is removed from the integrated mesh and the layer is redrawn.
Add polygons to the modification
Sketch polygons when you choose Create New Modification on the Add Modification dialog box. When modifying the mesh layer, you are not editing the mesh directly; rather, you are applying a modification to it. This modification changes the drawing of the mesh. To clip, mask, or replace parts of an mesh with a polygon, you need to create a polygon for the specific operation.
Click the mesh layer in the Contents pane.
Click the Scene Layer or 3D Tilles Layer tab set, and click the Data tab.
Note:
For Google Mesh layer, use the Create Features tool in the Edit tab.
On the Data tab, select the Clip button
 , Mask button
  , or Replace button
  to open the Create Features pane.
With the Clip tool, you can clip the mesh based on the inside of the created polygon.
Click the Clip tool to open the clip template. Create a polygon at the specified height and position. Press F2 or click Finish Sketch
 .
.The mesh layer redraws with the applied modification.
Optionally, choose a different tool or editing template to apply other operations, such as mask or replace, to the integrated mesh.
Click Save on the Edit tab. Turn off the modifications in the Contents pane to view only the mesh.
Edit modification polygons
You can change the shape of a polygon after it has been created. This allows you to adjust the polygon to fit a new area of interest. For example, if a building shifted, you can move the polygon that replaces the mesh to the new location of the building. You can modify the polygons the same way you edit any other feature layer.
Right-click the modification in the Contents pane and click Attributes
 .
.In the attributes table, select the row of the polygon to be edited.
Click Modify
 on the Edit tab.
Choose one of the editing tools in the Modify Features pane to change one or multiple polygons, for example, Edit Vertices
 .
.Press F2 to complete the change.
Click Save on the Edit tab.
Turn off the modification layer to view only the integrated mesh layer.
Change the modification operator in the attribute table
You can change the operator of the modification that is applied to the mesh layer, for example, to flatten an area instead of clipping it out. The operators are saved in the attribute table of the modification. To change an operator, you need to change the value of a field in the attribute table.
Right-click the modification in the Contents pane.
Click Attributes
.In the attribute table, select the polygon for which you want to change the operator.
In the
Modifierfield, change the attribute to the modification you want to apply to the polygon, for example, Replace or Mask.Press Enter to finish the change.
After finishing your edits, click Save on the Edit tab.
Batch update a modification operator
You can batch update the operator for multiple polygons using the Calculate Field tool.
Right-click the modification in the Contents pane.
Click Attributes
.In the attribute table, right-click the
Modifierfield and click Calculate Field.On the Calculate Field tool dialog box, select the
Modifierfield for Field Name.For the expression, use 0 for clip, 1 for mask, or 2 for replace.
Click OK to run the tool.
The
Modifierfield is updated with the specified operator.
Disable a modification
Modifications can be enabled or disabled on the mesh layer. Disabling the modification still shows the sketched polygons, but no modifications are applied to the mesh.
Right-click the mesh layer in the Contents pane and click Modification.
Click the Disable Modifications button
 .
.The modification is disabled and the entire mesh draws.
Share a modification in a web scene
You can share an mesh layer with modifications in a web scene
You cannot share the modification with the mesh as an individual 3D layer, it must be shared as a web scene. You cannot share more than 2,000 modifications.
On the Contents tab in ArcGIS Online or ArcGIS Enterprise, you can see the new web scene and open it in Scene Viewer. Because the modification is shared with the mesh layer, only the 3D web layer is listed with the web scene. The web scene can be opened in ArcGIS Pro through the Catalog pane.