Use manual error management
Manual error management requires a person, rather than an automated system, to confirm that an error found using ArcGIS Data Reviewer checks or visual review tools is fixed. When an editor fixes an error and clicks Evaluate Rules, the error moves from Reviewed  or Unacceptable to the Resolved
 state and requires manual review to mark the error as Acceptable
 . For example, a reviewer in your organization examines the correction and marks the error Acceptable . Until this review happens, the error stays in the Resolved state.
Manual error management phase and status
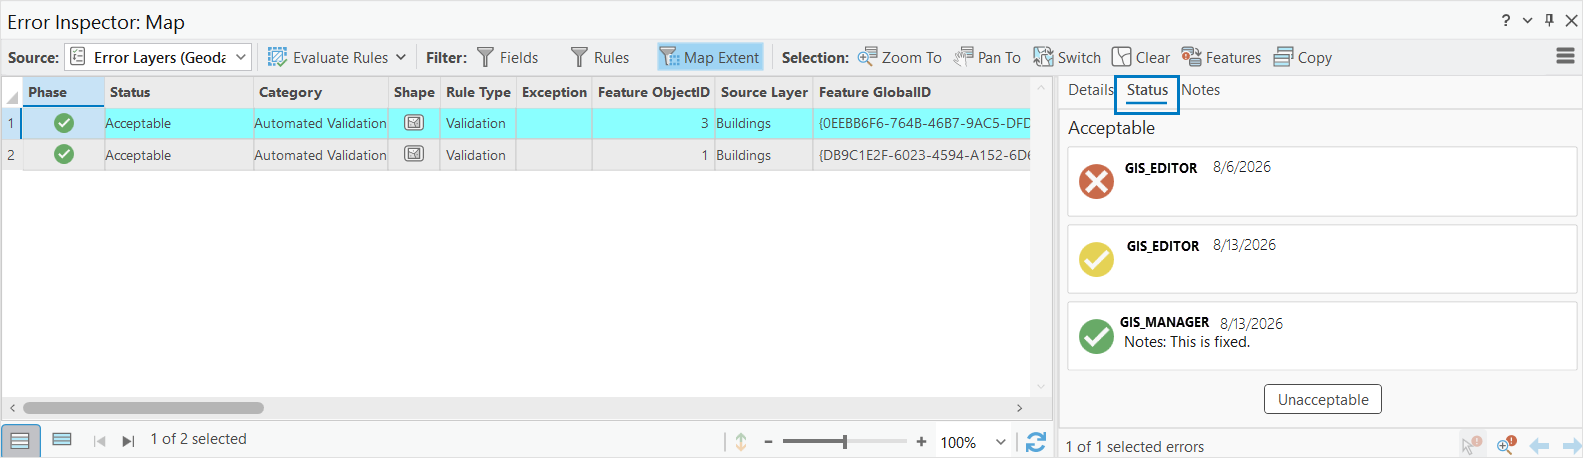
Select one or more errors in the Error Inspector pane by clicking the row header, and in the Details pane, click the Status tab to see its current status and how the error has moved through its life cycle. The tab shows who found the error, who resolved it, and who accepted it, along with the date each action took place.
Note:
To select multiple error results from validation attribute rules and visual review errors in the Error Inspector pane, the errors must have the same Phase, Status, and Category.
The Status tab displays up to three cards ordered from top to bottom:
Reviewed or Unacceptable
—The error was found or has not been fixed.Resolved or Mark as Exception
—The error was fixed or flagged as an exception to the rule.Acceptable or Exception
—The correction was reviewed and approved.
Note:
To set an error's status to Resolved, you must first correct the error so that it no longer violates the rule. Then, re-evaluate the error in the Error Inspector pane.
The Status tab is also used to manually update the error's status:
When an error is Resolved
, mark it Acceptable to confirm the fix, or Unacceptable if the error was not fixed correctly.When an error is Reviewed
but does not actually violate the rule, you can choose Mark as Exception . A Mark as Exception error can then be marked as an Exception once the exception is verified.When an error is already Acceptable
or an Exception , you can set it back to Unacceptable .
Correction and verification notes
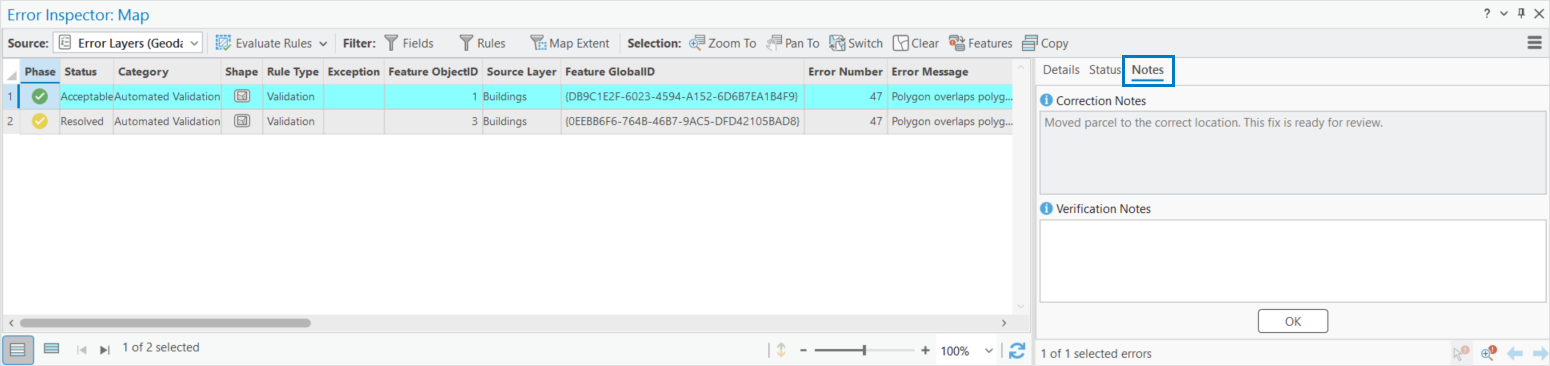
Use the Notes tab to record how an error was fixed and why the fix was approved. Add correction notes as you work to fix an error, and add verification notes when you review a correction.
Note:
Notes are limited to 256 characters.
When multiple error results are selected in the Error Inspector pane, the Notes tab becomes disabled.
Correct and review an error
After you enable manual error management, you can review the errors that Data Reviewer validation attribute rules or visual review tools find in your data. To manually move an error through the error life cycle, complete the following steps:
Enable manual error management by using the Set Reviewer Properties geoprocessing tool or from the geodatabase properties pane.
On the ArcGIS Pro ribbon, click the Edit tab, and in the Manage Edits group, click Error Inspector
 .
The Error Inspector pane appears.
In the Error Inspector pane, click Evaluate Rules
 .
If your data contains errors, error records appear in the Reviewed
state in the Error Inspector pane.Review the errors and choose an error that you want to fix.
To fix a validation attribute rule error, complete the following steps:
Fix the error and save the edit.
Click Evaluate Rules
in the Error Inspector pane.
The error changes to the Resolved
state.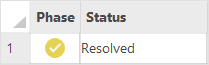
To fix a visual review error found using the Browse Features or Flag Missing Features tool, complete the following steps:
Select the error in the Error Inspector pane.
Click the Status tab, and click Resolved.
The error changes to the Resolved
state.Select the row header of the fixed error record, which is now in the Resolved
state.On the Notes tab, add any details about the fix in the Correction Notes text box.
Click OK.
The pane switches to the Status tab, which shows information such as the username of the person who found the error and the date the error was found.
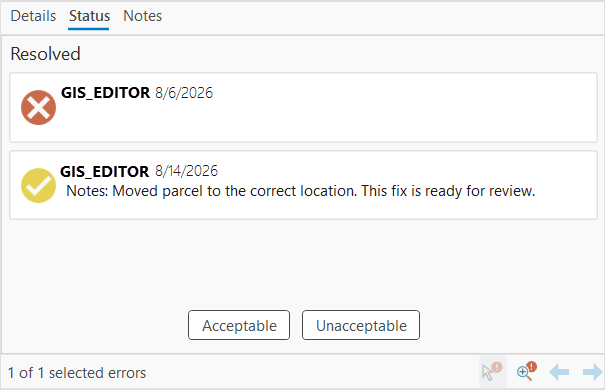
At this point in the workflow, someone in your organization can review the correction to mark the error as fixed.
Select the row header of the same error record if it is not already selected.
On the Status tab, click Acceptable.
The pane switches to the Notes tab.
In the Verification Notes text box, add notes describing the verification action.
Click OK.
The pane switches to the Status tab, which shows information such as the username of the person who verified the error and the date the error was verified.
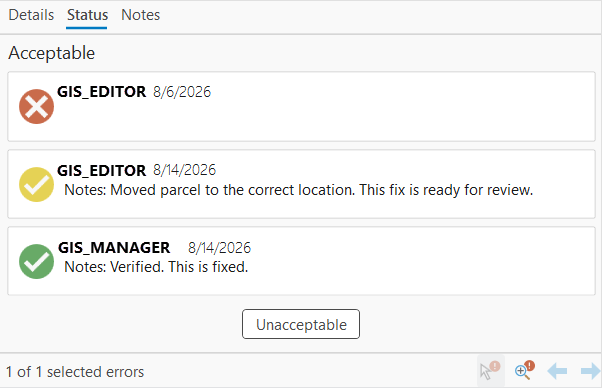
In the Error Inspector pane, the error record updates to Acceptable
.
Mark an error as an exception
Some validation attribute rule or visual review errors in the Error Inspector pane are exceptions to the rule rather than problems to fix. To mark an error as an exception, complete the following steps:
Enable error management by using the Set Reviewer Properties geoprocessing tool or from the geodatabase properties pane.
On the ArcGIS Pro ribbon, click the Edit tab and click Error Inspector
.The Error Inspector pane appears.
In the Error Inspector pane, click Evaluate Rules
.If your data contains errors, error records appear in the Reviewed
state in the Error Inspector pane.Review the errors and choose an error that is an exception to the rule.
Select the row header of the error record you want to mark as an exception to highlight the entire row.
Click the Status tab.
Click Mark Exception.
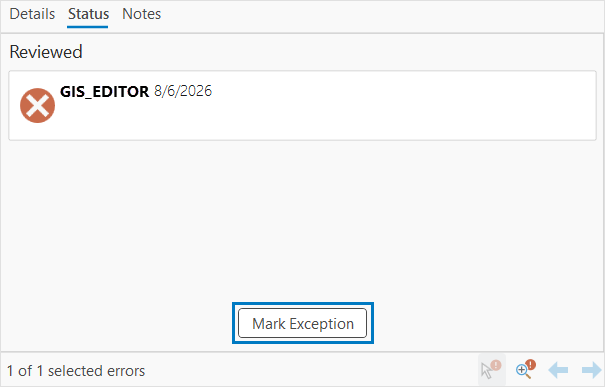
In the Error Inspector pane, the error record updates to Mark as Exception
.On the Notes tab, add notes explaining that the error result is an exception to the rule, in the Correction Notes text box.
Click OK.
The pane switches to the Status tab, which shows information such as the username of the person who set the error as an exception and the date it was set to Resolved.
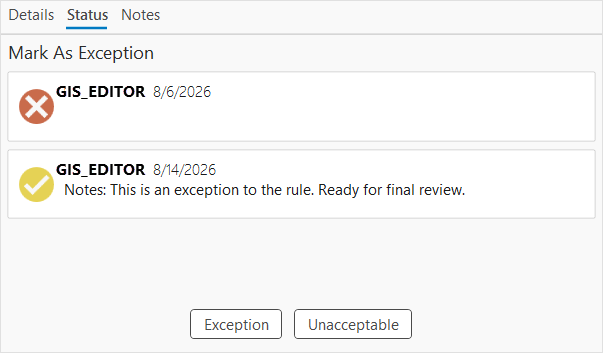
At this point in the workflow, someone in your organization can review the correction to mark the error as an exception.
Select the row header of the same error record if it is not already selected.
Click the Status tab.
Click Exception.
On the Notes tab, add notes describing the exception action, in the Verification Notes text box.
Click OK.
The pane switches to the Status tab, which shows information such as the username of the person who verified the error and the date the error was verified.
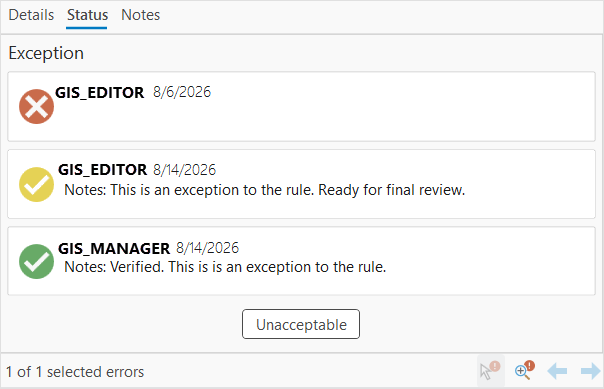
In the Error Inspector pane, the error record updates to Exception
.
Mark an error as unacceptable
After a validation attribute rule or visual review error is marked Acceptable or Exception, you can still change it to Unacceptable if the error was not fixed correctly or if the exception actually violates the rule. To cycle a fixed error or an exception back through the review process, complete the following steps:
In the Error Inspector pane, select an error in the Acceptable
or Exception state.On the Status tab, click Unacceptable.
On the Notes tab, place your cursor after the existing verification note in the Verification Notes text box, press Enter, and type an explanation as to why the Acceptable or Exception error result is not correctly fixed.
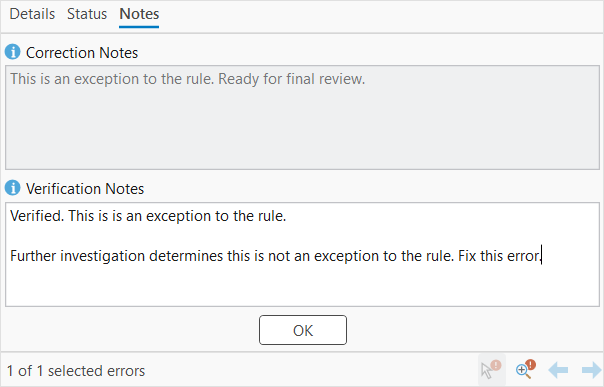
Click OK.
In the Error Inspector pane, the error record changes to Unacceptable
.