Tutorial: Create a locator with more than one dataset of the same role
In this tutorial, you will learn how to combine similar datasets for easier searching using a single locator. The city of Denver has three datasets for different types of public parks, but they only want one POI locator to contain all three. Anyone can use this POI locator to see search results from all three datasets at once to get the most accurate information about the parks available to them.
When building a locator, you cannot use more than one dataset for each primary role. If you have multiple datasets that you want to assign to the same role, you can combine the datasets prior to building the locator using the Merge geoprocessing tool. Then you can search against your combined dataset using a single locator.
This tutorial also demonstrates how to search by category included in the POI data from the locator you create.
Download the data
The data for this tutorial is available for download.
Go to the data download page.
Click the Download button, and save the file locally.
Unzip the downloaded file.
Combine the data
Combine the datasets to build a locator with a single role.
Start ArcGIS Pro.
Create a project from the Map template.
Right-click Folders in the Catalog pane, and click Add Folder Connection.
On the Add Folder Connection dialog box, browse to the geocoding tutorial folder and click OK.
Expand Folders in the Catalog pane, and expand the geocoding tutorial folder that you added in the previous step.
Expand the Denver geodatabase in the geocoding tutorial folder.
Drag the Parks feature class from the folder onto the map.
The map zooms to Denver, Colorado, and a polygon layer is visible on the map. The polygon layer is also shown in the Contents pane.
Drag the Dog_Parks feature class from the folder onto the map.
A new polygon layer is visible on the map.
Drag the Skate_Parks feature class from the folder onto the map.
A new polygon layer is visible on the map.
In the Geoprocessing pane, type merge in the search box.
If the Geoprocessing pane is not open, on the Analysis tab, click Tools
 to open the Geoprocessing pane.
Click the Merge (Data Management) tool
 to open the tool in the Geoprocessing pane.
For the Input Datasets parameter, select Parks from the drop-down menu.
A second drop-down menu is available below the first after you select the first layer.
For the Input Datasets parameter, select Dog_Parks from the drop-down menu.
A third drop-down menu is available below the first after you select the first layer.
For the Input Datasets parameter, select Skate_Parks from the drop-down menu.
For the Output Dataset parameter, rename the output dataset Denver_AllParks.
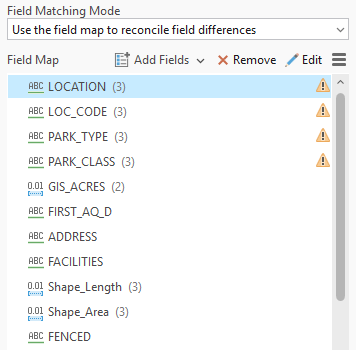
For the Field Matching Mode parameter, select Use the field map to reconcile field differences from the drop-down menu.
The Field Map opens in the Merge pane.
Important:
The error next to the text fields reads: The field length is shorter than the source fields. The target field length is shorter than the sum of the lengths of the source fields. For this tutorial, the warning can be ignored since you are not creating longer text values from the source values. In other workflows, for example when source field values are combined to create long text strings, you may need to make the target field longer.
For the Field Map parameter, keep the default field mapping values.
In your data, if you have fields that refer to the same value, for example Dog Park Name and Skate Park Name instead of Name, map those fields to the same value so they will be in the same field in the output dataset. For more information, see Merge.
Click Run to create the new combined dataset of Denver parks.
The output dataset is created in the project geodatabase by default and appears as a new feature class layer in the Contents pane.
The Denver_AllParks polygon layer is visible on the map.
Create a POI locator
Use the new combined dataset to create a POI locator with categories and subcategories.
Click the Back button to return to the main view of the Geoprocessing pane.
If the Geoprocessing pane is not open, on the Analysis tab, click Tools
to open the Geoprocessing pane.Type create locator in the search box.
Click the Create Locator tool
to open the tool in the Geoprocessing pane.Leave the Country or Region parameter as the default value of United States.
For the Primary Table parameter, select Denver_AllParks from the drop-down menu.
The layer is available in the drop-down menu because it has been added to the map.
For the Role parameter, select POI from the drop-down menu.
For information about other roles you can use to build locators, see Primary locator roles.
In the Field Mapping portion of the tool, select the appropriate field from the Alias Name drop-down menu for each relevant field name in the Role: POI section to map the fields.
For Place Name, select
LOCATION.For Place Category, select
PARK_TYPE.For Place Subcategory, select
PARK_CLASS.
For more information about the types of values expected for each locator role field, see Locator role fields.
For the Output Locator parameter, rename the output locator Denver_Parks.
Select English from the Language Code drop-down menu.
Click Run.
Important:
A warning message is returned after running the tool, which is expected because administrative zones (city, state, postal code) were not used in Field Mapping. For more details, click WARNING 003097 under View Details. The Create Locator tool can show warning or error messages while using or after running the tool. Clicking the warning or error number opens a help topic that provides more details about the message.
The locator is created in the project folder by default and is automatically added to the project. You can use it in the Locate pane, in the Geocode Table pane, and anywhere else you use locators.
Search using the Locate pane
The steps above create a locator based on the POI role that supports searching for points of interest—such as buildings, landmarks, parks, and restaurants—or features such as rivers, bridges, and mountains. This locator can be used to search for various types of parks in Denver using place-names and categories.
Open the Locate pane.
To disable all other locators in the project before searching with the Denver_Parks locator, click the Options button
 , and uncheck the providers listed so that only the Denver_Parks locator is selected.
Search each term using the Locate pane:
DOGPARK
SKATEP
Trail
Regional
Echo Lake
Greenway
To search using the Locate pane, either copy the address into the search box and press Enter or begin typing the place or category in the search box and select a suggestion that appears as you type.
Note:
You can also geocode global coordinates (latitude/longitude, Military Grid Reference System (MGRS), Decimal Degrees (DD), or United States National Grid (USNG)) using any locator created with the Create Locator tool. Support for coordinate searching is disabled or enabled under Categories to support on the Geocoding options page of the Locator Properties dialog box for the locator.