Connect to a database
In ArcGIS Pro, you can work with the following database resources:
File geodatabases (
.gdb)Mobile geodatabases (
.geodatabase)SQLite databases (
.sqlite) and OGC GeoPackage files (.gpkg)Enterprise geodatabases (
.sde), which are stored in supported databasesSupported databases and cloud data warehouses (
.sde)Supported document databases (
.dbconn)OLE DB connections (
.odc)
These resources have different software architectures and properties. File geodatabases, mobile geodatabases, SQLite databases, and GeoPackage files are stored on the file system. Enterprise geodatabases, databases, and cloud data warehouses are remotely located and are accessed through connection files stored on the file system.
Note:
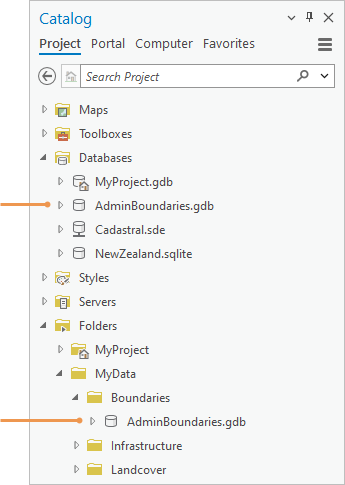
The term database is often reserved for database management systems (DBMS) such as IBM Db2 or Oracle. However, in an ArcGIS Pro project, all the resources listed above may appear in the Databases container ![]() of the Catalog pane or catalog view and are called databases in this context.
of the Catalog pane or catalog view and are called databases in this context.
One way to access a database is to browse to it from a folder connection. (If the database is remote, you browse to its database connection file.) For convenience, you can also add a database to the catalog's Databases container ![]() . This does not copy or move any files; rather, it creates a connection—essentially, a reference or shortcut—that allows you to use the resource without browsing to its folder location.
. This does not copy or move any files; rather, it creates a connection—essentially, a reference or shortcut—that allows you to use the resource without browsing to its folder location.
It may be useful to make a database connection to a resource while maintaining access to it from a catalog folder. For example, some geoprocessing operations on input data create text or XML files that can't be stored in an output database. By default, these output items are stored in the folder that contains the database and must be accessed from a folder connection.
Note:
You may need to refresh a connection if the contents of an item are changed outside your current ArcGIS Pro session. You may need to repair a connection if it becomes invalid.
Access a database in a folder
You can access and use a database by browsing to the folder that contains it. If the database is remotely located, you browse to its connection file, which is stored on the file system.
Connect to a folder that contains the database you want to use.
In the Catalog pane or a catalog view, browse to the database from the folder connection.
Add a database to a project
You can add an existing database or database connection file to the catalog's Databases container ![]() . This allows you to use the database without browsing to a folder.
. This allows you to use the database without browsing to a folder.
Open a browse dialog box using one of the following methods:
On the ribbon
Click the Insert tab. In the Project group, click Connections
 , point to Database, and click Add Database .
In the Contents pane of a catalog view
Click Databases
 . On the ribbon, click the Catalog tab. In the Create group, click Add
  and click Add Database .
In the Catalog pane
On the Project tab, right-click Databases
and click Add Database .Browse to and select one or more geodatabases, SQLite databases, GeoPackage files, or database connection files on your local computer or a network computer.
Click OK.
The database appears in the Databases container
in the Catalog pane and the Contents pane of a catalog view.You can also add a database to a project using the following methods:
In the Catalog pane, a catalog view, or the Contents pane of a catalog view
Browse to a database, right-click it, and click Add To Project
 .
.Browse to a database, select it, and drag it to the Databases container
in the Catalog pane or the Contents pane of a catalog view.
In File Explorer
Browse to a database, select it, and drag it to the Catalog pane or the Contents pane of a catalog view. It appears in the Databases container
.
Create a file or mobile geodatabase
There are many ways to create a file or mobile geodatabase from the user interface and add it automatically to the project. You can also use the Create File Geodatabase geoprocessing tool to set a File Geodatabase Version parameter or the Create Mobile Geodatabase geoprocessing tool.
Create a file or mobile geodatabase in the current folder
In this workflow, you first browse to a folder and then specify the item you want to create.
Create a file or mobile geodatabase using one of the following methods:
In a catalog view
Browse into a folder. On the ribbon, click the Catalog tab. In the Create group, click New
 and click File Geodatabase
  or Mobile Geodatabase .
In the Catalog pane
Browse to a folder and select it. Right-click the folder, point to New
, and click File Geodatabase or Mobile Geodatabase .On a browse dialog box
Browse into a folder. Click the New Item drop-down arrow and click File Geodatabase
or Mobile Geodatabase .A file or mobile geodatabase is created with a default name. The name is immediately editable.
Type a new name for the geodatabase and press the Enter key.
The geodatabase is updated with the new name. It appears in its folder location in the catalog and under the Databases container
.
Create a file or mobile geodatabase and browse to a folder
In this workflow, you first specify the item you want to create and then browse to a folder.
Create a file or mobile geodatabase using one of the following methods:
On the ribbon
Click the Insert tab. In the Project group, click Connections
, point to Database , and click New File Geodatabase or New Mobile Geodatabase .In the Contents pane of a catalog view
Click Databases
. On the ribbon, click the Catalog tab. In the Create group, click New and click New File Geodatabase or New Mobile Geodatabase .In the Catalog pane
On the Project tab, right-click Databases
and click New File Geodatabase or New Mobile Geodatabase .Browse to a folder on your computer or a network computer.
The default location is the project home folder.
In the Name box, type a name for the file geodatabase.
Click Save.
A file geodatabase is created and added to the project. It appears in its folder in the catalog and in the project's Databases container
.
Create a GeoPackage
There are many ways to create a GeoPackage from the user interface and add it automatically to the project. You can also use the Create SQLite Database geoprocessing tool to set a Spatial Type parameter.
Create a GeoPackage in the current folder
In this workflow, you first browse to a folder and then specify the item you want to create.
Create a GeoPackage using one of the following methods:
In a catalog view
Browse into a folder. On the ribbon, click the Catalog tab. In the Create group, click New
and click GeoPackage .In the Catalog pane
Browse to a folder and select it. Right-click the folder, point to New
, and click GeoPackage .Type a new name for the GeoPackage and press the Enter key.
The GeoPackage is updated with the new name. It appears in its folder location in the catalog and under the Databases container
.
Create a GeoPackage and browse to a folder
In this workflow, you first specify the item you want to create and then browse to a folder.
Create a GeoPackage using one of the following methods:
On the ribbon
Click the Insert tab. In the Project group, click Connections
, point to Database , and click New GeoPackage .In the Contents pane of a catalog view
Click Databases
. On the ribbon, click the Catalog tab. In the Create group, click New and click New GeoPackage .In the Catalog pane
On the Project tab, right-click Databases
and click New GeoPackage .Browse to a folder on your computer or a network computer.
The default location is the project home folder.
In the Name box, type a name for the GeoPackage.
Click Save.
A GeoPackage is created and added to the project. It appears in its folder in the catalog and in the project's Databases container
.
Connect to a supported database
To connect to a supported database, you must fill in connection properties that identify the database and authenticate your credentials. Typically, this information is provided by a database or GIS administrator. A successful connection creates a database connection file that is stored by default in your project home folder.
Note:
You may need to install client software on your computer before you can create the connection file.
The database to which you connect may or may not contain an enterprise geodatabase. If it does not, you can still view data in the database in ArcGIS Pro.
For details on connecting to supported databases, see the following topics:
Create a database connection: Set up a database connection
Create a database connection with a geoprocessing tool: Create Database Connection
Create an enterprise geodatabase in a supported database: Geodatabase management
Access nonspatial data in databases (including databases not certified for use with ArcGIS Pro): Work with OLE DB connections
Connect to a cloud warehouse
Connecting to a supported cloud warehouse is similar to connecting to a database, although some connection properties may be different. See Connections to cloud data warehouses in ArcGIS Pro.
Add a database to your project favorites
If you use the same database in many projects, you can make it a project favorite. A favorite database can be added to any project from the Catalog pane, a catalog view, or a browse dialog box. When you make a database connection a favorite, its connection properties are stored and don't need to be provided again when you add the favorite to another project. Optionally, a copy of the database connection file can be saved to your favorites cache folder.
You can create databases that are automatically made favorites. These resources—such as a new file geodatabase or a new database connection file—are stored in your favorites cache folder and are potentially available on every computer you use.
Tip:
You can make a database a favorite by dragging it from a catalog view or File Explorer to My Favorites ![]() on the Favorites tab of the Catalog pane or to the corresponding location in the Contents pane of a catalog view.
on the Favorites tab of the Catalog pane or to the corresponding location in the Contents pane of a catalog view.
Remove a connection
You can remove an item connection in the Catalog pane or catalog view if you no longer need to work with the item or if its contents become unavailable. When you remove an item connection, the item and its contents are no longer directly accessible from the project. However, they are not deleted from their computer, network, or cloud location.
You cannot remove item connections to items required by the project, such as the home folder, default toolbox, and default geodatabase.
To remove a connection, complete the following steps:
In the Catalog pane, browse to the item connection.
Alternatively, with the catalog view active, browse to the item connection in the Contents pane or the catalog view.
Click the item connection to select it.
Right-click the item and click Remove From Project
 .
.When the catalog view is active, you can also use the ribbon to remove an item connection. On the ribbon, click the Catalog tab. In the Organize group, click Remove
.